

A small fleet of under 20 vehicles can be fully rebranded in 1 to 3 months; mid-sized fleets typically need 3 to 9 months, and large or multi-market rollouts run 6 to 18 months. The three biggest factors influencing the timeline are vendor lead times, approval speed, and how many vehicle models need custom design work. Start now by launching a fleet audit and setting a formal kickoff date.
TL;DR:
- Small fleets can be fully rebranded in about 10 weeks if approvals and vendor lead times align; larger fleets may require up to a year or more.
- Approvals, design, and vendor selection typically cause the most delays, especially if the audit phase is skipped or approval processes are slow.
- Prioritizing customer-facing and high-mileage vehicles reduces mobilization costs and maximizes brand impressions during the rebrand.
- Budgeting should include a 15% to 25% buffer for delays, material issues, or vehicle prep time, and is best managed through batch printing and phased installation.
- Proper disposal of old vinyl and staff training should be scheduled early to avoid rework, with training happening one to two weeks before vehicle installation.
Table of Contents
- What Are the Phases of a Fleet Rebrand?
- Sample Schedules by Fleet Size
- Which Vehicles Should Get Wrapped First?
- How Long Does Vendor Selection Take?
- How Long Does Installation Take Per Vehicle?
- Budgeting Around the Timeline, Not Just the Total Cost
- What Should QA Checks Cover After Installation?
- NJ Vinyl Wrapz: How Professional Practices Shorten Timelines
- What Happens to the Old Branding Materials?
- When Should Staff Get Trained on the New Branding?
- Trade-Offs Worth Weighing Before You Commit
- Ready to Put a Real Date on Your Rebrand?
- Sources
- FAQ
What Are the Phases of a Fleet Rebrand?
Every fleet rebrand timeline moves through six phases, and skipping the audit is the single most common way projects blow their schedule.
- Planning and audit (2 to 4 weeks for small fleets, longer for large ones). Build a full asset list, note vehicle condition, and confirm any state signage or DOT marking requirements before design starts.
- Design and templates (2 to 6 weeks). Create one master template per vehicle model, lock color specs in Pantone or CMYK, and produce engineering mockups scaled to each body style.
- Approvals (1 to 4 weeks). Brand, legal, safety, and regulatory sign-off happen here. Missing brand standards at this stage is one of the most common causes of added delay.
- Production and materials (1 to 6 weeks). Print runs, lamination, and material lead times depend on order volume and vendor capacity.
- Installation. Sequencing matters more than raw install speed here; a rushed schedule with no buffer creates bottlenecks at the shop bay.
- QA and corrections. Build in an inspection window and a rework slot before vehicles return to full service.
A step-by-step approach to design and approvals can shave real time off phases two and three if the template system is built right the first time.
Sample Schedules by Fleet Size
Copy these as a starting point and adjust for your own approval chain.
- Small fleet (5 to 20 vehicles): Week 1 to 2, audit and kickoff. Week 3 to 5, design and approvals. Week 6 to 8, print and production. Week 9 to 10, installation and QA. Total: about 10 weeks.
- Mid-sized fleet (21 to 100 vehicles): Month 1, audit and design. Month 2, approvals and a pilot install on two to three vehicles. Month 3 to 5, phased production and installation by region. Month 6, QA sweep and corrections. Total: 5 to 6 months.
- Large fleet (100+ vehicles, multi-state): Months 1 to 2, audit, template lock, and legal review across every operating state. Months 3 to 4, pilot batch and vendor scaling. Months 5 to 10, rolling installation by hub. Months 11 to 12, final QA and stragglers. Total: up to a year, sometimes longer for multi-country rollouts.
Insert a pilot install right after approvals, not before, so the design is already final when you test it. Build in a 15% to 25% buffer on every phase to absorb material delays, weather, or a vehicle that shows up needing extra bodywork.
Which Vehicles Should Get Wrapped First?
Not every vehicle deserves the same priority slot. Customer-facing units, high-mileage vehicles, and vehicles based at regional hubs with heavy foot traffic should move to the front of the line because they generate the most brand impressions per week. Vehicles nearing lease expiration go last, or get skipped entirely if the lease ends within a few months of the rebrand.
- Customer-facing service vans and delivery trucks first
- High-mileage units next, since they log the most public exposure
- Regional hub vehicles clustered together to reduce mobilization costs
- Leased vehicles near end-of-term last, or excluded from the run entirely
A single template-based design system that adapts across sprinter vans, box trucks, and sedans cuts revision cycles dramatically compared to designing each model from scratch.
Pro Tip: Phase by geography, not just vehicle type. Clustering installs by region lets one install crew handle a full batch in consecutive days instead of bouncing between cities.
How Long Does Vendor Selection Take?
Vendor selection is where a lot of fleet rebrand timelines quietly lose weeks. Build the RFP process into your master schedule, not around it.
- Build the checklist first. Confirm the vendor works with premium materials like 3M or Avery, installs in a climate-controlled facility, carries proper licensing and insurance, and can produce references from past fleet jobs.
- Run the RFP and selection. For most mid-sized projects, this takes 2 to 4 weeks from first outreach to signed contract.
- Onboard the vendor. Expect 1 to 2 weeks to finalize file formats, get sample proofs approved, and confirm production slots.
- Set milestone payments. A design deposit typically comes due at contract signing, a second payment when print production begins, and a final balance at installation completion.
A documented workflow guide helps keep every vendor accountable to the same milestones instead of working off separate assumptions.
How Long Does Installation Take Per Vehicle?
Surface prep drives more schedule risk than the actual wrap application. New factory paint needs roughly 30 days to cure before vinyl goes on, and any vehicle with body damage or heavy oxidation needs extra prep time built into its slot.
- Vehicle lettering or spot graphics: a few hours per vehicle
- Partial wraps: half a day to a full day
- Full wraps: typically 1 to 2 days per vehicle
A full wrap on a standard cargo van generally takes 1 to 2 days from prep through final inspection. Stagger handovers so no more than a few vehicles are out of service at once, and decide early whether installs happen at a shop or via mobile service, since that choice changes how many vehicles you can process per week.
Budgeting Around the Timeline, Not Just the Total Cost
Costs land at specific points in the schedule, and knowing when they hit helps you avoid a cash-flow surprise mid-project.
- Design deposit due at contract signing, before any artwork starts
- Printing and materials invoiced once artwork is approved and the print run is scheduled
- Installation balance due on completion, sometimes split across install batches for large fleets
Batch printing across multiple vehicle models and bundling install days into single site visits both cut cost and calendar time. A wrap options overview is a useful reference when comparing material and job-type tradeoffs before locking a budget.
What Should QA Checks Cover After Installation?
QA isn’t optional, and skipping it is how fleets end up with inconsistent branding six months later.
- Inspect adhesion and edge sealing on every panel within the first week of installation.
- Check color match against the approved template under daylight, not shop lighting.
- Confirm legal markings like DOT numbers and required signage are present and correctly placed.
- Log issues and set a correction SLA, typically 5 to 10 business days for touch-up work.
- Track KPIs for 3 to 6 months: conversion percentage completed, touch-up rate, and visual consistency across the fleet.
NJ Vinyl Wrapz: How Professional Practices Shorten Timelines
More than 10 years installing fleet wraps has taught NJ Vinyl Wrapz that most delays come from revision cycles, not the install itself. Working exclusively with 3M and Avery materials in climate-controlled facilities, fully licensed and insured, cuts weather-related rework and material failures. Standardized templates and in-house design control mean fewer approval loops between design and production, which is where most fleet rebrand timelines quietly stall.
What Happens to the Old Branding Materials?
Old vinyl doesn’t just disappear when a new wrap goes on, and skipping this step creates both a compliance gap and a wasted opportunity. Removal is a distinct line item on the schedule, not an automatic byproduct of installation.
Most installers strip old graphics before applying new material, since layering vinyl over vinyl causes adhesion problems and visible seams. Budget roughly 1 to 3 hours per vehicle for removal, depending on how long the old wrap has been on and how much adhesive residue is left behind. Vehicles with sun-baked or brittle vinyl take longer, since the material tends to tear rather than peel cleanly.
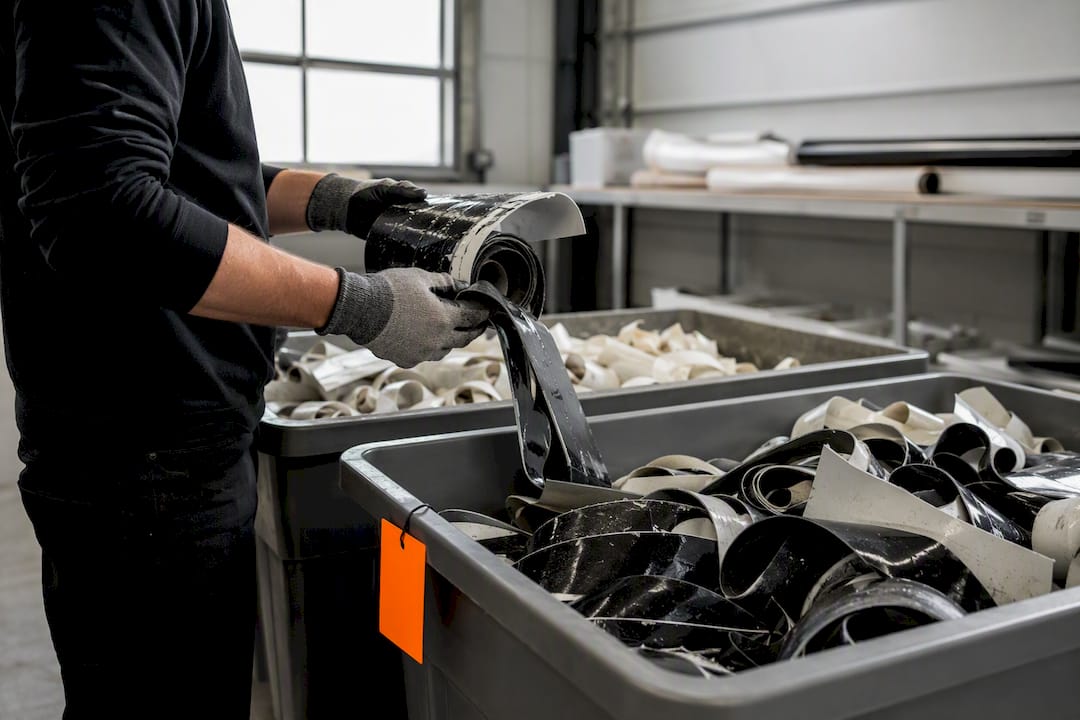
Once removed, the old vinyl and any leftover backing paper should go through a proper waste stream rather than the trash. Vinyl film is a petroleum-based product, and most municipal recycling programs don’t accept it curbside. Ask your installer whether they route removed material to a commercial recycler; some print and signage vendors already have a relationship with a facility that handles PVC film waste. If a vendor can’t answer that question, treat it as a mark against them during vendor evaluation.
Set disposal as its own line in the master schedule, right alongside installation, not as an afterthought squeezed in during QA. For fleets removing more than a handful of vehicles’ worth of material, batching removal into a single week ahead of the new install run keeps disposal logistics from tangling with the production schedule.
When Should Staff Get Trained on the New Branding?
Training rolled out too early gets forgotten by installation day. Rolled out too late, and drivers show up to a wrapped vehicle with no idea what changed in signage, load markings, or customer-facing messaging. The sweet spot is roughly one to two weeks before each vehicle group goes into the install queue.
Structure training in two short sessions rather than one long one. The first, delivered during the approval phase, covers what’s changing and why. This is also the moment to loop in leadership visibly, since managers who stay engaged for the first six months after a rebrand see far less pushback and inconsistent adoption from regional teams. The second session happens right before or right after a vehicle’s install, covering practical items: where new decals or window graphics sit relative to sightlines, any updated DOT numbering placement, and how to report damage to the new wrap.
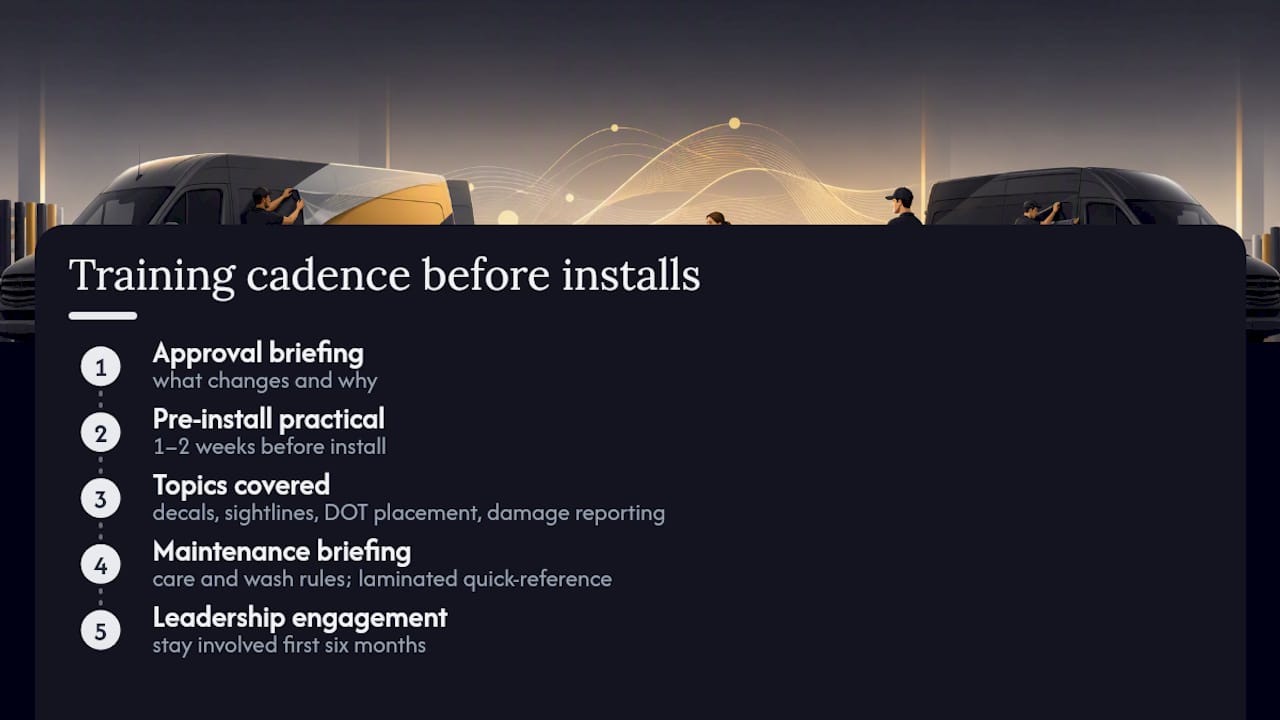
Maintenance teams need a separate, shorter briefing focused on care. Vinyl wraps have different washing and chemical tolerances than bare paint, and a maintenance crew still using old-school degreasers on a wrapped panel can void a warranty within weeks. Give this group a laminated quick-reference card, not a slideshow.
Keep a simple log of who’s been trained and when, tied to the same vehicle-by-vehicle tracker used for installation sequencing. It becomes the fastest way to catch a driver or technician who missed the briefing before a problem shows up in the field.
Trade-Offs Worth Weighing Before You Commit
Speed and consistency pull against each other more than most schedules admit. Accelerate only when the fleet is small enough that one vendor can hold the whole design standard in their head; spread the rollout when you’re managing multiple regions, since rushing multi-market approvals is how inconsistent branding slips through. Brief procurement, operations, and marketing together in one meeting before kickoff, and get leadership visibly behind the rollout for six months, not six weeks.
— NJ Vinyl Wrapz
Ready to Put a Real Date on Your Rebrand?
Every timeline in this guide assumes one thing: a vendor that can actually hold to it. NJ Vinyl Wrapz runs full fleet wraps, vehicle lettering, and template-based design systems out of climate-controlled facilities, so weather and material failures don’t become your delay. Backed by more than a decade of fleet work and partnerships with 3M and Avery, the process is built to compress the design-to-install gap that trips up most in-house teams.
If your fleet is still in the audit stage, that’s the right moment to call. Request a fleet audit and a pilot install on two or three vehicles before committing to a full rollout schedule. Start with a quote on full vehicle wraps if you’re branding the whole fleet, or look at vehicle lettering if a faster, lower-cost partial rebrand fits your budget better this quarter.
Sources
For deeper case studies, see the CXLABS fleet rebrand study; for governance guidance, see updating fleet policy.
- 5 strategies when rebranding your company’s vehicle fleet
- 7 Tips for Successful Fleet Rebranding | Blog
- Fleet Vehicle Graphics: How to Brand a Fleet - Signality
FAQ
What Does a 2026 Rebrand Actually Involve for a Fleet?
A fleet rebrand in 2026 covers design, material selection, approvals, production, installation, and post-install QA across every branded vehicle, typically guided by a phased timeline scaled to fleet size.
What Are the Main Phases of a Rebranding Process?
The core phases are planning and audit, design and templates, approvals, production and materials, installation, and QA and corrections, each with its own duration range depending on fleet size.
Why Is Rebranding a Fleet Risky if It’s Rushed?
Rushing skips the audit and approval steps that catch missing brand specs or vehicle condition issues, and that’s exactly what causes inconsistent branding and rework later in the rollout.
What Is Fleet Branding and How Does It Work?
Fleet branding applies consistent graphics, lettering, or full wraps across a company’s vehicles using templated designs and durable materials like 3M or Avery, installed by a vendor following a set sequence from design through QA.
How Much Buffer Time Should I Add to a Fleet Rebrand Schedule?
Add 15% to 25% on top of your planned schedule to cover material delays, weather, and vehicles that need extra prep work before installation.