Every delivery van, service truck, and company car in your fleet is a moving billboard crossing New Jersey’s highways, neighborhoods, and business districts every single day. A sharp, professionally installed custom wrap can generate tens of thousands of impressions each month without paying for a single ad slot. But a poorly executed wrap, one that peels at the edges, bubbles across the hood, or shows misaligned graphics, sends exactly the wrong message to potential customers. This guide walks you through the full process: what to prepare, how to execute, what to watch for, and how to verify that your fleet’s new look will last and perform.
Table of Contents
- Why custom wraps matter for your NJ fleet
- Tools, materials, and environment: The essentials setup
- Step-by-step custom wrap installation process
- Troubleshooting and common mistakes
- A professional perspective: What most miss about fleet wrap installs
- Upgrade your fleet’s image with NJ Vinyl Wrapz
- Frequently asked questions
Key Takeaways
| Point | Details |
|---|---|
| Branding impact | A professional wrap turns fleet vehicles into high-visibility marketing tools for your business. |
| Proper preparation | Using the right tools and perfectly prepping surfaces ensures long-lasting results. |
| Expert execution | Knowledgeable installers deliver superior finishes and fewer costly mistakes. |
| Troubleshooting advice | Common installation issues can be fixed with professional tips and timely corrections. |
| Next steps | Upgrading your fleet’s image is easy with trustworthy local wrap professionals. |
Why custom wraps matter for your NJ fleet
New Jersey is one of the most densely populated states in the country, and that density is a massive advantage for any business using vehicle wraps. Your fleet does not sit in a lot all day. It moves through Trenton, Newark, Cherry Hill, and every town in between, exposing your brand to a wide range of potential customers on every trip.
The numbers back this up. Mobile advertising reaches 95% of Americans who travel by car, and a single wrapped vehicle can generate between 30,000 and 70,000 impressions per day in urban and suburban markets. For a New Jersey fleet manager running even five vehicles, that compounds quickly into millions of brand impressions each month, all from a one-time investment.
The business case is clear:
- Brand recognition: Consistent, professionally designed wraps reinforce your brand across every vehicle in your fleet.
- Cost efficiency: Compared to digital or print advertising, wrap advertising has one of the lowest cost per impression rates in marketing.
- Vehicle protection: Quality vinyl actually shields factory paint from UV damage, minor abrasions, and road debris.
- Local relevance: Branded vehicles signal an established, professional business to your New Jersey community.
The risk is equally real. A DIY or bargain-shop wrap job introduces several failure points. Incorrect surface prep means adhesive failure within months. Overstretching vinyl in tight curves causes thinning and discoloration. Misaligned graphics make your brand look careless, which is far worse than no wrap at all. These are not hypothetical problems. They are the most common reasons businesses end up paying to re-wrap vehicles prematurely.
Pro Tip: Fleet consistency is not just about aesthetics. When every vehicle in your lineup carries the same colors, logo placement, and design elements, you build a stronger memory anchor in customers’ minds. Inconsistent wraps across your fleet dilute that impact. Before installation, make sure your design files are standardized and approved for every vehicle type in your lineup. Our NJ fleet wrap solutions team can help you standardize design templates across multiple vehicle makes and models.
Now that you see the impact of a good wrap on your branding, let’s get into what you need before installing.
Tools, materials, and environment: The essentials setup
Getting the setup right is where most DIY attempts fall apart. Professional installers do not just have more experience. They have the right tools, the right materials, and the right environment working in their favor on every single job.
Here is a comparison of the core tools and materials you will need, along with what each one contributes to quality:
| Tool or material | Purpose | Quality impact |
|---|---|---|
| Squeegee with felt edge | Apply vinyl smoothly | Prevents scratches and air pockets |
| Heat gun or torch | Conform vinyl to curved surfaces | Ensures adhesion around edges and recesses |
| Precision knife or blade | Trim excess vinyl cleanly | Clean edges prevent peeling and lifting |
| Isopropyl alcohol (70%+) | Degrease surfaces before application | Critical for long-term adhesion |
| Lint-free microfiber cloths | Wipe and dry surfaces | Prevents trapped particles under vinyl |
| Premium cast vinyl (3M or Avery) | Base wrap material | Durability, conformability, and color accuracy |
| Application fluid or wet slip | Allows repositioning during install | Reduces wasted vinyl and mistakes |
| Measuring tape and masking tape | Alignment and positioning | Ensures symmetrical, professional placement |
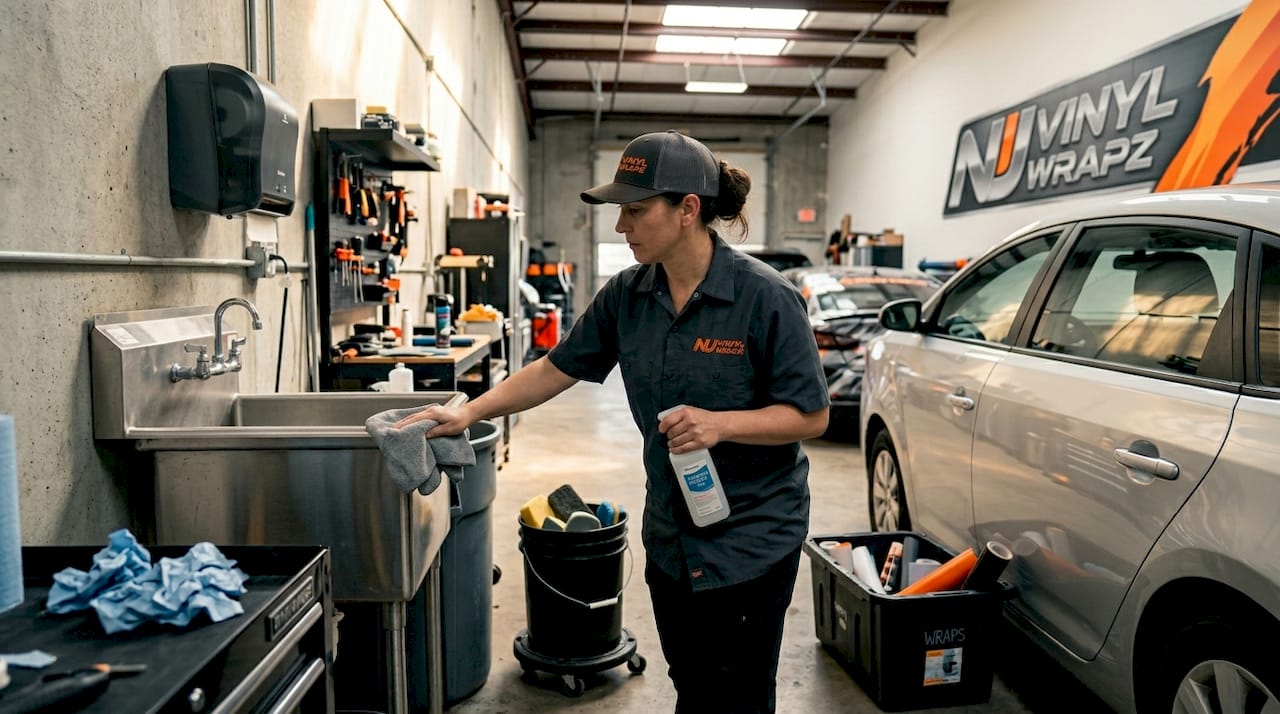
Workspace conditions matter just as much as the tools themselves. Professional installations happen in climate-controlled facilities for a reason. Vinyl adhesive behaves differently depending on temperature and humidity. Here is what your workspace needs before you begin:
- Temperature: Maintain between 60°F and 80°F. Below 60°F, vinyl becomes stiff and adhesive underperforms. Above 80°F, the vinyl may stretch unpredictably.
- Humidity: Keep it under 60%. High humidity traps moisture between the vinyl and the paint surface, leading to bubbling and poor adhesion.
- Dust control: Even small particles can create visible bumps under the vinyl film. Sweep, mop, and settle the air before beginning work.
- Lighting: Use bright, even lighting to spot surface defects, bubbles, and alignment issues as you go.
- Vehicle cleanliness: Wash the vehicle with a clay bar process, then degrease with isopropyl alcohol at all application areas.
Surface preparation is not optional. Every hour spent on prep directly reduces the risk of failure. Start by washing the vehicle thoroughly, then clay bar the surface to remove embedded contaminants, then wipe down with isopropyl alcohol. Any remaining wax, polish residue, or oil will block the adhesive from bonding properly.
Pro Tip: Temperature is the single most controllable variable in your workspace. Install vehicle wrap options work best when both the vinyl and the vehicle surface are at the same temperature. If a vehicle has been sitting in a cold parking lot, bring it into the shop and let it warm up for at least 30 minutes before starting. Applying warm vinyl to a cold panel is a recipe for adhesion failure.
The right prep and tools directly impact installation quality. Let’s move into the actual wrap process step by step.
Step-by-step custom wrap installation process
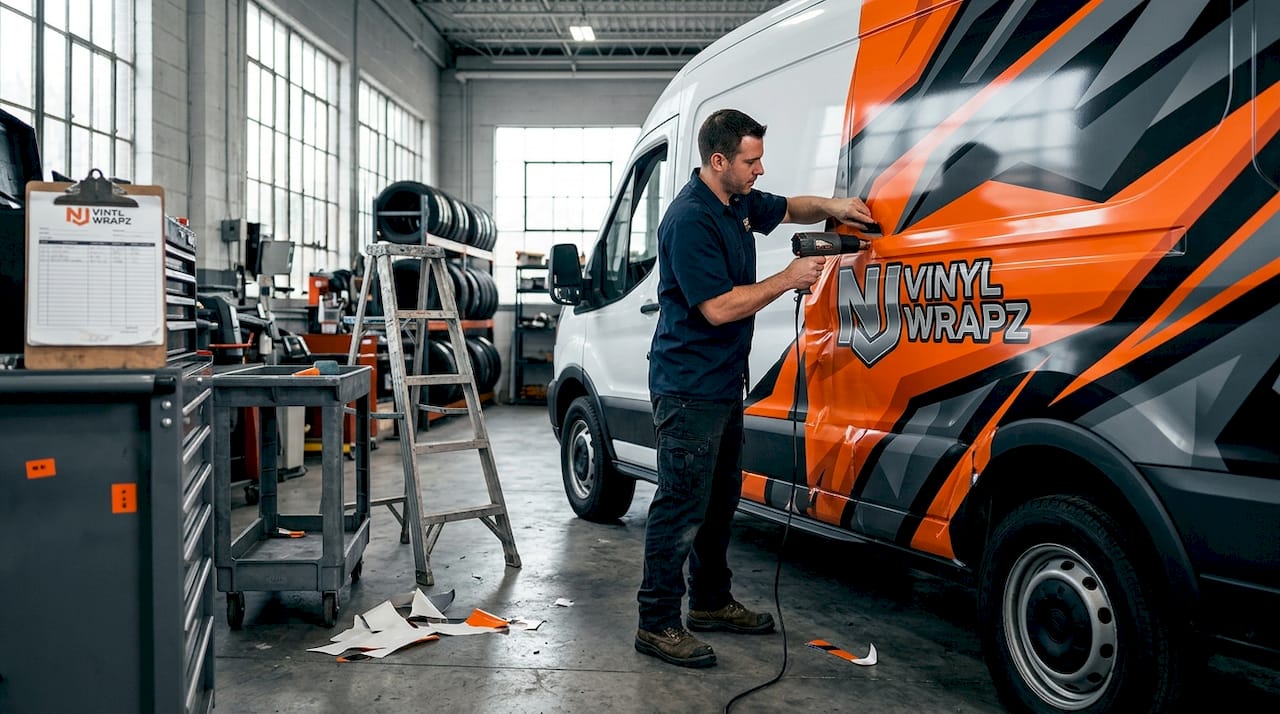
Even experienced wrap technicians follow a disciplined sequence. Skipping steps or rushing through the process creates problems that are expensive and time-consuming to fix later. Here is the full installation breakdown:
| Step | Action | Tools needed | Safety note |
|---|---|---|---|
| 1 | Final surface wipe-down | Isopropyl alcohol, microfiber cloth | Ventilate the area when using alcohol |
| 2 | Measure and cut vinyl panels | Measuring tape, precision knife | Keep blades sharp to prevent tearing |
| 3 | Position and tack vinyl | Masking tape, application fluid | Do not stretch vinyl during positioning |
| 4 | Apply vinyl with squeegee | Felt-edge squeegee, heat gun | Work from center outward to push air |
| 5 | Conform edges and recesses | Heat gun, rivet brush | Avoid overheating, which can burn vinyl |
| 6 | Trim excess material | Precision knife, cutting tape | Cut against a seam, not freehand |
| 7 | Post-heat the entire panel | Heat gun or heat lamp | Post-heat seals edges and sets adhesive |
| 8 | Final inspection | Bright lighting | Look for bubbles, lifts, and misalignment |
Here is the numbered walk-through in detail:
- Clean and degrease. Even if the vehicle looks clean, do a final alcohol wipe on every panel you are wrapping. This step alone prevents the majority of adhesion failures.
- Measure and cut your panels. Leave at least two inches of overlap on every edge. Tight cuts before application leave no room for adjustment and guarantee errors.
- Position the vinyl. Use masking tape or a hinge method to hold the vinyl in place before committing. For large panels, get a second set of hands. Alignment errors are extremely difficult to fix once the adhesive contacts the surface.
- Apply with the squeegee. Start at the center of the panel and work outward in overlapping strokes. This technique pushes air toward the edges rather than trapping it in the middle.
- Work the edges and recesses. Use a heat gun to soften the vinyl, then stretch it gently into door handles, bumper curves, and body contours. Do not force it. Overstretching creates thin spots that fade faster and are more likely to lift.
- Trim with precision. Use a dedicated wrap-cutting tape along panel edges to guide your blade and prevent scratching the paint beneath. Always use a sharp blade. A dull blade tears vinyl instead of cutting it cleanly.
- Post-heat every panel. After trimming, run the heat gun over the entire wrapped surface, especially edges and seams. Post-heating activates the adhesive fully and prevents edge lifting over time.
- Inspect under good lighting. Walk the entire vehicle looking for any bubbles, lifted edges, or misalignment. Small bubbles near edges can be worked out with a squeegee or pin-popped carefully.
Safety warning: Precision knives used during trimming are extremely sharp and can cause serious cuts if your hand slips. Always cut away from your body and use a cutting glove on the non-dominant hand. Additionally, adhesive fumes and isopropyl alcohol fumes can accumulate in enclosed spaces. Keep your workspace ventilated throughout the entire commercial vinyl installation process.
With the steps in mind, it is common to run into snags. Here is how to handle them.
Troubleshooting and common mistakes
Even skilled installers encounter issues. The difference between a professional result and a failed wrap often comes down to recognizing problems early and knowing how to address them before they become permanent.

Bubbles under the vinyl are the most common complaint. Small bubbles near the center of a panel can often be worked out by applying heat and using a squeegee to push them toward the nearest edge. Tiny bubbles near edges sometimes self-heal within 48 hours as the adhesive settles. Large bubbles, especially those that appear cloudy or milky, usually indicate moisture or a contaminated surface. At that point, the section needs to be removed and reapplied.
Misalignment and crooked graphics happen when installers skip the positioning and tacking step. Once the adhesive makes full contact, repositioning is nearly impossible without damaging the vinyl. The fix is prevention: always use a tacking method to verify placement before full application.
Stretching and thin spots appear most often at door edges, bumper curves, and mirror housings. This is where cast vinyl outperforms cheaper calendered vinyl. Cast vinyl is designed to conform to complex curves without thinning. If you are using calendered vinyl on a curved surface and seeing thin, shiny areas, the material is already compromised and will fail prematurely.
Edge lifting is usually caused by either poor surface prep or skipping the post-heat step. The adhesive never fully bonded to the paint, and temperature changes cause the edge to peel back. The short-term fix is a heat gun and firm squeegee pressure. The long-term fix is better prep and always post-heating.
Here is a quick reference for the most common problems:
- Bubbles near center: apply heat and squeegee outward
- Bubbles at edges: check surface prep, may need to remove and reapply
- Misalignment: remove before full adhesion, reposition, and retry
- Edge lifting: post-heat immediately and apply firm pressure
- Thin or stretched spots: that section needs replacement, not repair
- Adhesive residue on paint: use adhesive remover or isopropyl alcohol
Pro Tip: If you are wrapping a high-visibility vehicle like a cargo van, box truck, or vehicle that anchors your brand in the community, do not push your luck with a DIY install. A single bad wrap on a prominent company vehicle costs far more in brand perception than the savings from skipping professional service. Our full vehicle wrap services team handles complex installs daily and guarantees a clean result with durable materials.
Once you have tackled possible hassles, it is time to verify and enjoy your fleet’s upgraded look.
A professional perspective: What most miss about fleet wrap installs
After over a decade of wrapping commercial vehicles across New Jersey, we have seen a pattern: the installs that fail fastest are rarely the result of bad vinyl. They are the result of skipped prep, wrong temperature, or inexperienced hands rushing the trimming stage.
The biggest mistake we see from business owners attempting their first fleet wrap is treating the vinyl application like hanging wallpaper. Vinyl on a vehicle panel has to conform to compound curves, tolerate heat cycling through New Jersey winters and summers, and resist road vibration every single day. That demands a level of material quality and technique that most DIY setups cannot deliver consistently.
We also see businesses underestimate the long-term ROI of a professional install. A properly installed cast vinyl wrap from a trusted brand lasts five to seven years. A rushed DIY job often fails within twelve to eighteen months, meaning you pay twice to reach the same endpoint. Even our color change wraps follow the same standard: if the prep and environment are not right, no amount of quality material will save the result.
The small details, the post-heat pass, the clean edge trim, the climate-controlled environment, are what separate a wrap that turns heads from one that tells customers you cut corners.
Upgrade your fleet’s image with NJ Vinyl Wrapz
If this guide has shown you anything, it is that professional fleet wrapping is as much about process and environment as it is about the vinyl itself.
At NJ Vinyl Wrapz, we bring over 10 years of commercial installation experience, a climate-controlled facility, and premium materials from 3M and Avery to every project. Whether you need full vehicle wraps for a single van or a complete rebrand across your entire fleet, our team handles design, printing, and installation under one roof. Explore our fleet wrap solutions or reach out to NJ Vinyl Wrapz today to request a quote and see how we can put your brand on the road with confidence.
Frequently asked questions
How long does a custom vehicle wrap installation take?
A standard fleet wrap installation typically takes 1 to 3 days per vehicle depending on size and design complexity. Scheduling multiple vehicles at once can reduce overall project time when coordinated with your installer.
Can custom wraps be removed without damaging the paint?
Yes, high-quality cast vinyl wraps from brands like 3M and Avery are designed to be removed cleanly when properly installed, and they actually protect the factory paint underneath during their lifespan.
What surface prep is required before installing a wrap?
Every vehicle surface must be washed, clay-barred to remove contaminants, degreased with isopropyl alcohol, and fully dried before vinyl application to ensure strong adhesion and long-term durability.
Are there different wrap options for partial versus full coverage?
Yes, businesses can choose from partial wraps covering specific panels, full wraps covering the entire vehicle, spot graphics, or custom lettering, each offering different levels of visibility and investment based on your branding goals.