
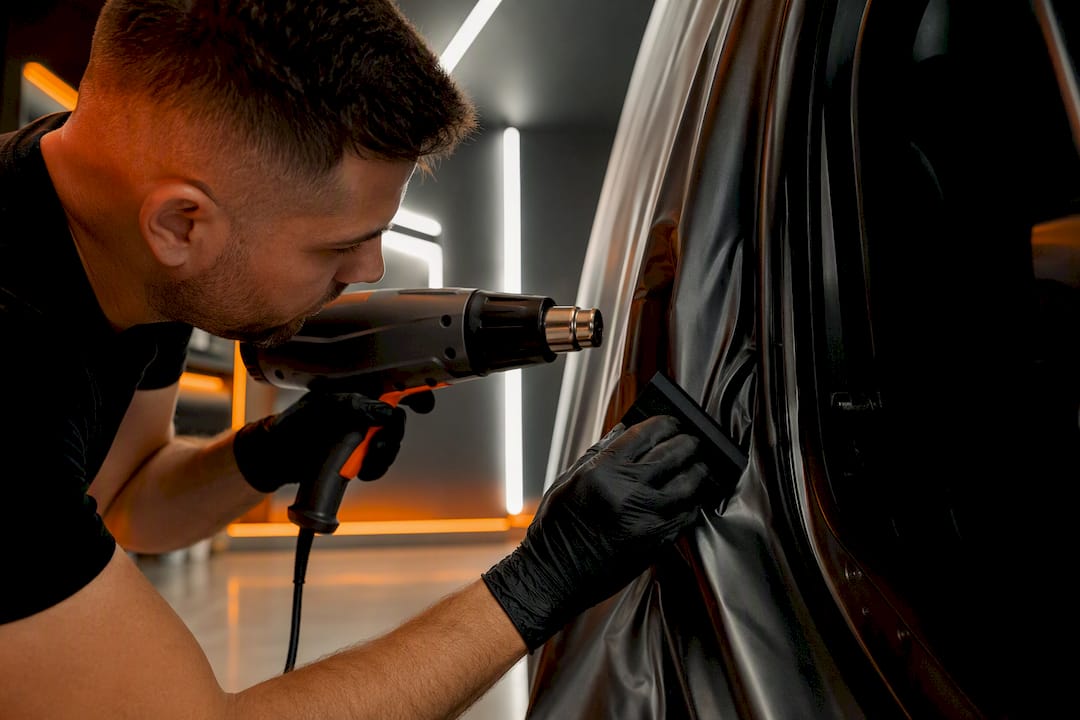
Yes, you can wrap door jambs, and when done right it looks factory-molded. The catch is your starting surface: if the paint is sound and seams are tight, a wrap door jambs project is a great weekend upgrade… If you see flaking paint, rust, or failed seam sealer, skip the full tuck and either do a partial wrap or call a pro. Fleet vehicles or anything you plan to resell deserve warranty-backed professional installation, not a DIY gamble.
TL;DR:
- Wrapping door jambs is feasible only if the paint is in good condition, with no rust, flaking, or failed seam sealer, otherwise partial wraps or professional help are recommended.
- Proper preparation involves cleaning the surface thoroughly with degreaser, clay bar, and alcohol, and removing hardware to ensure a secure bond and clean finish.
- Using premium cast vinyl that conforms well to curves and controlling heat within 120-140°F during application improves durability and prevents film failure.
- For complex areas such as hinges and seals, slow, careful work, precise masking, and post-heat treatment at high temperatures are crucial to lasting results.
- Commercial jobs typically cost between $1,500 and $3,000 per vehicle depending on the scope, with professional installation strongly advised for high-flex or fleet projects.
Table of Contents
- How to Prep Door Jambs Before You Wrap Them
- What Tools and Materials Do You Need to Wrap Door Jambs?
- Step-by-Step: How Do You Wrap a Door Jamb?
- Why Heat and Tension Control Make or Break a Jamb Wrap
- Working Around Hinges, Wiring, and Weatherstripping
- What Should You Check After the Wrap Is Done?
- What Does Commercial Door Jamb Wrapping Cost?
- What Happens to Leftover Vinyl and Old Wrap Material?
- When Field Experience Beats a YouTube Tutorial
- Ready for a Professional Jamb Wrap in New Jersey?
- Sources
- FAQ
How to Prep Door Jambs Before You Wrap Them
Before you touch a roll of vinyl, walk the jamb in bright light and check three things: paint condition, seam sealer integrity, and any chips or rust bubbling near the hinges. A jamb with failing paint underneath will lift film no matter how good your technique is. In that case, a partial wrap that stops short of the compromised area holds up far longer than forcing full coverage over a bad substrate.
Once you’ve confirmed the surface is workable, prep goes in this order:
- Remove or lift trim pieces where you can, and mark their original position with tape or a photo.
- Degrease the jamb to strip road grime and old detailing residue.
- Rinse and dry completely, then clay bar if the surface still feels gritty.
- Wipe down with 70% isopropyl alcohol as your final panel prep step.
Silicone-based tire shines and interior dressings migrate onto jambs more than most people realize, and a quick alcohol wipe alone won’t remove it. Layering degreaser, clay, and a proper panel wipe is the difference between a wrap that bonds and one that peels in six weeks. Photograph hinge clearances before you start. It saves you from guessing where things went back together if you need to remove hardware mid-project.
What Tools and Materials Do You Need to Wrap Door Jambs?
Jamb work punishes cheap tools more than flat panel wraps do, because you’re working tight radii and rubber transitions with your hands close to hinge pinch points.
- A soft squeegee for initial lay-down and a hard felt-edge squeegee for final pressure
- A heat gun with adjustable temperature control (not a hair dryer)
- An infrared thermometer to confirm film surface temp, not guesswork by feel
- Knifeless tape for clean trim lines without razor marks
- A hard card wrapped in a microfiber cloth for tucking into returns
- Edge sealer for high-wear spots like the sill
For film, premium cast vinyl from brands like 3M or Avery outperforms calendared film on jambs specifically because cast vinyl conforms to compound curves without the memory that pulls calendared film back toward flat. Adhesion promoter has its place on bare metal chips or old seam sealer edges, but it’s a targeted fix, not something you spray across the whole jamb. Overusing it just masks poor tension control.
Step-by-Step: How Do You Wrap a Door Jamb?
Treat each door jamb as three separate zones: the sill, the hinge-side vertical return, and the latch-side vertical return. Finishing one zone completely before moving to the next keeps tension and heat manageable instead of fighting the whole jamb at once.
- Measure and cut with margin. Add 2 to 3 inches of extra film beyond your visible jamb dimensions so you have material to anchor and trim, not just enough to barely reach.
- Dry-fit before you peel any liner. Lay the film in place dry to confirm the grain direction and pick your anchor points. This is also when you decide whether hardware needs to come off; removing handles and moldings gives a cleaner result, but careful lift-and-tuck works if removal isn’t practical.
- Anchor the flattest plane first. That’s usually the sill. Lay it down with zero stretch and squeegee from the center outward to avoid trapping air.
- Work the vertical returns next. Feed the film into the recessed channel, making small relief cuts where the compound curve tightens rather than forcing one continuous stretch.
- Tuck with a wrapped hard card. Push the film fully into the return before trimming excess, so the edge disappears rather than sitting proud where you’ll see it every time the door opens.
- Save the hinge side for last. It’s the tightest geometry and benefits from everything you learned shaping the other two zones.
- Reseat the weatherstrip carefully. Tuck 3 to 5 millimeters of film under the seal lip rather than butting the edge against it, which is where lift usually starts.
- Run slow open-close tests. Cycle the door several times at low speed before final post-heat to catch any spot where the seal is pinching or dragging the film edge.
Why Heat and Tension Control Make or Break a Jamb Wrap
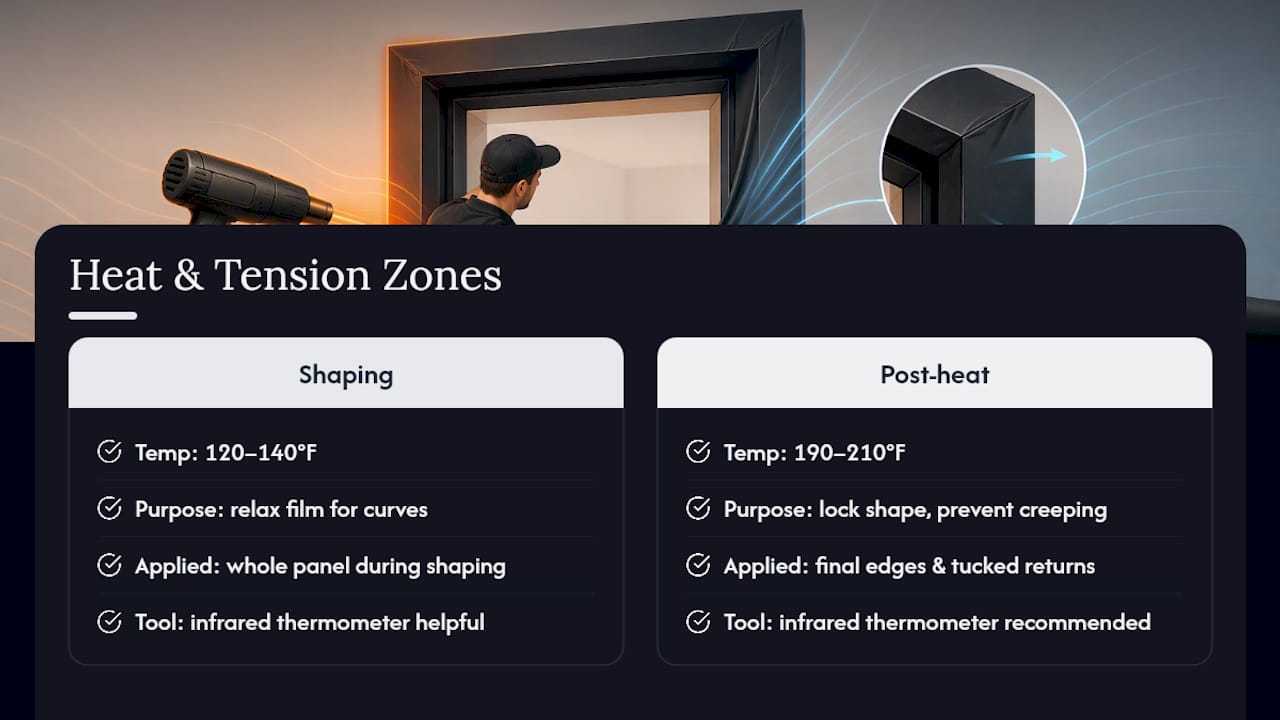
Temperature is where most DIY jamb wraps go wrong, usually from overheating out of impatience. Work the film at roughly 120°F to 140°F to relax it for shaping into curves and returns. That range makes cast vinyl pliable without softening the adhesive to the point it slides around under your squeegee.
Post-heat is a separate, later step and only belongs on final edges, not the whole panel. Bring cast film up to about 190°F to 210°F on edges and tucked returns to lock in the new shape and prevent the film from creeping back toward flat over the next few days. An infrared thermometer takes the guesswork out of this, and it matters more in a cold garage in January than a shop bay in July.
Pro Tip: Never point a heat gun directly at rubber weatherstripping. Rubber degrades and hardens fast under heat, and a stiff seal will fight the door for years after your wrap job is otherwise perfect.
If you notice the film thinning, going glossy in patches, or the adhesive starting to show through as a shadow, that’s a sign you’ve overstretched it. Back off, re-anchor from a fresh point, or pull that section and redo it. Pushing more heat onto stressed film rarely saves it; it just moves the failure to a different spot.
Working Around Hinges, Wiring, and Weatherstripping
Hinges are the single trickiest part of any jamb wrap, mechanically and visually. Mask hinge heads and fasteners completely before you start so you’re not cutting film around exposed hardware later, and always test door swing clearance slowly before you commit to a final trim.
- Decide early whether trim comes off entirely or gets lifted and tucked around, and mark exact locations either way.
- Route seam lines to land on painted metal wherever possible, then bridge onto rubber only at the very last inch.
- Use primer tape sparingly on rubber surfaces; it bonds inconsistently there compared to painted metal and can leave residue on removal.
- Check wiring boots near door hinges for pinch points before closing the door on fresh film for the first time.
What Should You Check After the Wrap Is Done?
Final inspection happens under more than one light source, since a seam that looks perfect under shop fluorescents can show shadowing in direct sun. Run a fingertip along every seam and return, feeling for any spot that lifts under light pressure rather than relying on eyesight alone.
- Post-heat only the final edges, not the full panel, to avoid gloss mismatch on matte or satin films.
- Cycle the door open and closed multiple times to confirm nothing drags or peels back.
- Wait at least 72 hours before pressure washing or aggressive interior detailing near the jambs.
- Stick to pH-neutral car soap and a soft microfiber for early cleanings, skipping degreasers on fresh film.
- Address any early lift immediately with a re-anchor or small re-tuck rather than waiting for it to spread.
- A thin bead of edge sealer on high-wear sill areas adds real insurance against foot traffic and grit.
What Does Commercial Door Jamb Wrapping Cost?
Pricing a commercial job is different from pricing your own car, mostly because of volume and consistency requirements. A single vehicle’s jamb work is usually bundled into a larger project rather than quoted alone, since jambs are rarely wrapped in isolation from the rest of the door or a full vehicle wrap.
For fleet accounts, the real cost driver is repeatability across dozens of vehicles with matching finish quality on every unit. That means a shop needs a documented process, consistent film batches, and installers trained on the same anchor and tuck sequence for every truck or van that comes through the bay. Businesses evaluating a fleet job should ask for a written scope that specifies whether jambs are included, what film brand is used, and what the warranty covers on high-flex areas like door returns.
Full vehicle wraps that include extended jamb coverage typically run higher than exterior-only wraps because of the added labor time jambs require, given the tight tucking and multiple heat cycles involved. Partial wraps that include selective jamb work fall in a lower range, generally between $1,500 and $3,000, since they cover less surface area and skip full-panel removal. Get a written quote that separates labor, material, and any hardware removal charges so you know exactly what you’re paying for before work starts.
What Happens to Leftover Vinyl and Old Wrap Material?
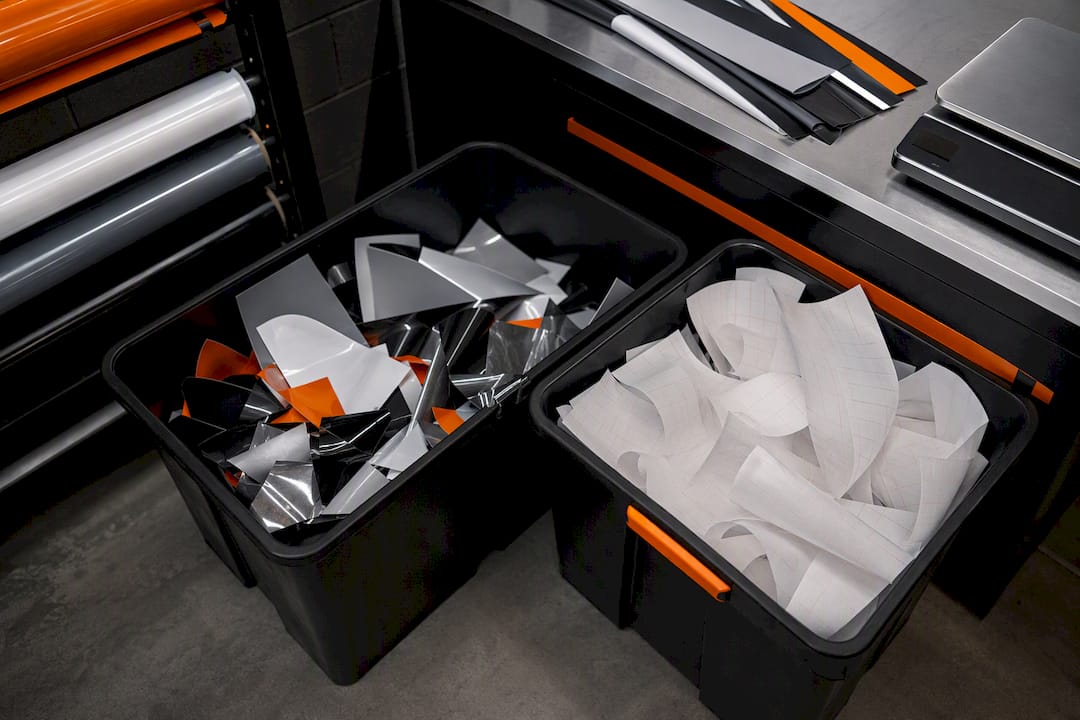
Vinyl wrap film, especially the cast vinyl commonly used for jambs, isn’t curbside recyclable in most municipalities because of its PVC composition and adhesive backing. Scrap pieces from trimming and old film pulled off during a re-wrap should go to a facility that handles PVC waste specifically, not a standard recycling bin.
Many wrap and sign shops accumulate trim scrap and liner backing in volume, and some regional recyclers accept clean vinyl offcuts separately from adhesive-backed waste. If you’re doing this at home, the more practical move is minimizing waste up front: measuring carefully so you’re not cutting oversized pieces “just in case,” and reusing test scraps for practice cuts on the tightest hinge returns instead of pulling fresh material for every attempt.
Cleaning chemicals matter too. Degreasers and clay lubricant used during prep should be wiped up with absorbent shop towels rather than hosed into a driveway drain, since runoff carries solvents and residue into stormwater systems in most areas. It’s a small step, but it’s the kind of detail that separates a careful installer from someone just trying to get the job done fast.
When Field Experience Beats a YouTube Tutorial
Jamb wraps look simple in a ten-minute video and take far longer to actually get right, especially around hinge pockets and compound curves. DIY makes sense on a clean, factory-paint jamb where you’re comfortable working slowly. It makes far less sense on failing paint, complex jamb geometry, or any fleet vehicle where a warranty matters. That’s the gap climate-controlled installation and years of jamb-specific reps actually close.
— NJ Vinyl Wrapz
Ready for a Professional Jamb Wrap in New Jersey?
If your jambs have paint issues, rust, or you just don’t want to spend a Saturday hunched inside a door frame, Professional installers handle the parts of a wrap job that punish DIY attempts the hardest: hinge geometry, seal reseating, and matching film tension across every panel on the vehicle. Installations done in climate-controlled facilities using premium materials can make a significant difference in results, especially in challenging areas like jambs where temperature swings often cause DIY wraps to lift within weeks.

Booking starts with an inspection where we document existing seam positions and flag any surface issues before a single sheet of film gets cut. From there you’ll get a clear timeline and aftercare guidance specific to your vehicle’s jamb geometry. Whether you’re after a full color change wrap with extended jamb coverage or a partial wrap that targets specific panels, request a quote and we’ll scope the job based on what your jambs actually need, not a generic package.
Sources
- Vinyl Wrapping Door Jambs: Pro Tips for a Seamless Look - Wool Wiki
- How Car Wrap Installation Works: The Complete Technical Process
- Engineerskill
- Car Wrap Vs Paint In Los Angeles: An Honest Body Shop Verdict - LUXE Auto Body
FAQ
Is It Possible to Wrap Door Jambs?
Yes, door jambs can be wrapped, but only when the paint underneath is sound and free of rust or flaking. If the surface is compromised, a partial wrap or bodywork first is the more durable choice.
Can You Paint Door Jambs Instead of Wrapping Them?
Yes, painting is a valid alternative, especially when the jamb has rust or damage that vinyl won’t hide well. Paint requires body shop prep and cure time, while wrapping offers a faster, reversible option when the existing paint is already in good shape.
How Long Does a Door Jamb Wrap Last?
A properly installed jamb wrap using premium cast vinyl can last several years on a well-prepped surface, though jambs see more flexing and contact than flat body panels. Budget calendared film tends to fail much sooner in the same high-flex areas.
Does Vinyl Wrap Adhere to Wood?
Vinyl wrap can adhere to sealed, smooth wood surfaces, but raw or porous wood needs priming first for a reliable bond. This isn’t relevant to automotive door jambs, which are metal, but it comes up often for interior or furniture wrap projects using the same film types.
What Does a Professional Door Jamb Wrap Cost?
Jamb coverage is usually bundled into a broader wrap project rather than priced alone. Partial wraps that include jamb work generally run $1,500 to $3,000, while full wraps with extended jamb coverage cost more due to added labor and multiple heat cycles.