
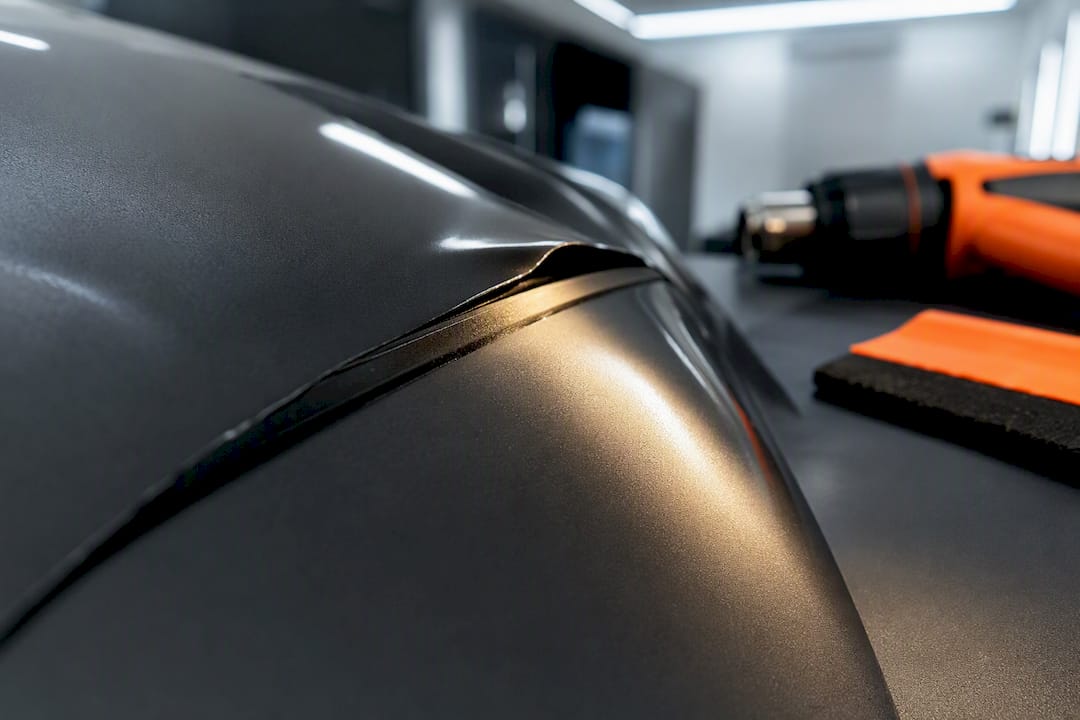
Edges curl for four main reasons: the vinyl was overstretched during install, the panel wasn’t clean before the film went on, the adhesive never got hot enough to bond, or the material itself shrank with age. For a small lift, wipe the area with isopropyl alcohol, warm it to activation temperature, press it flat, and seal the edge. If it lifts again within days, stop patching and diagnose the real cause instead.
TL;DR:
- Overstretching during installation causes stored tension that leads to edge lift after thermal cycling, often appearing weeks later.
- Surface contamination from wax, silicone, or residues prevents proper adhesive bonding and causes early edge lifting.
- Insufficient post-heat leaves the adhesive unactivated, significantly increasing the likelihood of early lift, especially on edges and seams.
- Using calendered vinyl instead of cast vinyl increases the risk of shrinkage and edge retreat over time, reducing long-term durability.
- Proper diagnosis of lift causes before repair is essential, as tension, contamination, and shrinkage each require different fixes to ensure lasting results.
Table of Contents
- Why Is Vinyl Wrap Lifting at the Edges?
- What to Do Right Now for a Small Lift
- What Causes Vinyl Wrap Edges to Lift?
- How to Prevent Vinyl Wrap Lifting From the Start
- How Do You Know Which Repair Path to Choose?
- How Do You DIY-Repair a Lifted Vinyl Wrap Edge?
- Why Do Professional Installs Fail Less Often?
- What Most Advice on Wrap Lifting Gets Wrong
- When Should You Call a Professional for Wrap Repair?
- Sources
- FAQ
Why Is Vinyl Wrap Lifting at the Edges?
Vinyl wrap lifting almost always traces back to one of four culprits, and figuring out which one you’re dealing with determines whether a five-minute fix will hold or whether you’re about to waste an afternoon.
Overstretching is the quiet killer. When an installer pulls film harder than the material wants to go around a compound curve, the vinyl stores that tension like a rubber band. It looks perfect on day one. Weeks later, as heat and cold cycle through the panel, the film slowly tries to snap back to its resting shape, and the edges are the first place that stored energy shows up as curl. Installers who’ve been doing this for years will tell you it’s the single most common DIY mistake behind delayed edge lift.
Contamination is the second big one, and it’s sneaky because you often can’t see it. Wax, silicone-based dressings, tar remover residue, even the invisible film left behind by a car wash’s rinse aid, all sit between the adhesive and the paint. The vinyl looks bonded when you first apply it, but there was never a real chemical grip there to begin with. Give it a month of sun and vibration, and the edge peels away like it was never stuck at all.
Then there’s insufficient post-heat. Pressure-sensitive adhesive needs to be brought up to its activation temperature to actually bond, not just stuck on cold and hoped for. Field data on wrap failures consistently points to under-activated edges as a primary driver of early lift, because a cold-applied edge has dramatically lower peel strength than one that was properly reheated during install.
Finally, material shrinkage. This one has nothing to do with your installer’s technique and everything to do with what film went on the car.
A few numbers worth knowing:
- Calendered vinyl, the cheaper, thinner category of film, is documented to be dimensionally unstable under repeated thermal cycling. It physically shrinks back from the edges over months of heat and cold, a problem largely absent from cast vinyl, which is manufactured to hold its shape.
- Seams and edges that shingle correctly, angled 1/4 to 1/2 inch away from airflow, shed water instead of catching it, which cuts down on one of the most common triggers for edge lift on horizontal surfaces.
A few smaller factors compound these four. Poor trimming leaves a ragged edge that catches wind and fingers alike. Skipping edge sealer leaves that cut edge exposed to water and road grime, which slowly works its way under the film from the outside in. None of these alone usually causes a full failure, but stacked on top of overstretch or weak post-heat, they tip a marginal install into a visible problem.
What to Do Right Now for a Small Lift
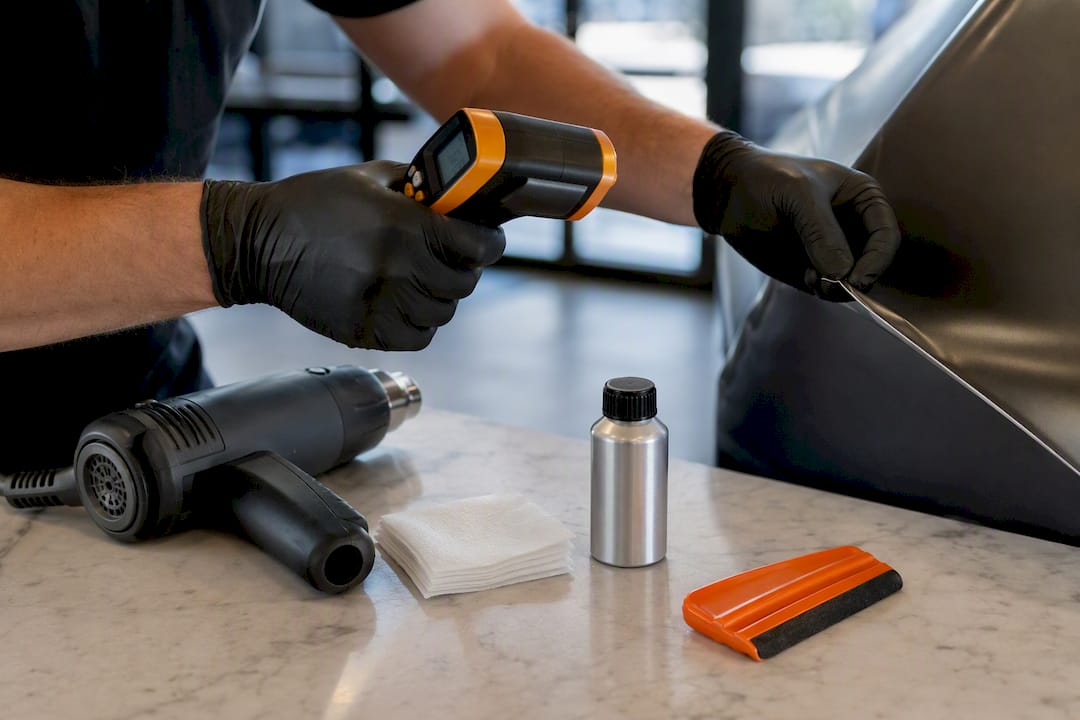
Before you touch anything, gather four tools: a heat gun with adjustable temperature (not a hair dryer), an infrared thermometer, a felt-edged squeegee, and a bottle of liquid edge sealer or adhesive promoter. Skipping the IR thermometer is the most common mistake DIYers make here. Guessing at heat by feel is how people either underheat the adhesive or scorch the vinyl.
- Wipe the lifted section with a cloth and 70% isopropyl alcohol to strip away any wax, road film, or grease hiding under the flap.
- Warm the area gradually, checking with the IR thermometer until the surface reaches the film’s activation range (check your material’s technical data sheet, but most PSA films activate in the 180 to 200°F range).
- Press the edge down immediately with the felt squeegee, working from the center of the lift outward, and hold pressure while the vinyl cools back to room temperature.
- Run a bead of edge sealer along the seam once it’s fully cooled, letting it cure per the product label before the car goes back into rain or a wash.
Pro Tip: Test-heat a hidden section first. If the vinyl darkens, bubbles, or gives off a strong odor, your heat gun is set too hot, and you’re seconds away from cooking the adhesive instead of reactivating it.
This sequence works well on small, recent lifts. It does not work on edges that have been curling for weeks, and it will not fix contamination. If the adhesive already failed to bond because of wax or silicone underneath, reheating and pressing just reactivates the same weak bond and it lifts again, often within days.
What Causes Vinyl Wrap Edges to Lift?
Understanding the mechanics behind each failure mode saves you from applying the wrong fix, which is the fastest way to waste a Saturday and a bottle of edge sealer.
Overstretching and stored tension. Vinyl film has memory. Stretch it around a tight radius, mirror caps and door handles are the classic offenders, and the material remembers its flat, unstretched state. Heat from the sun softens the adhesive just enough for that stored tension to slowly win, pulling the edge back toward its original shape one degree at a time. This is why overstretch failures often don’t show up for weeks after a fresh install looked flawless.
Surface contamination. This is the invisible-enemy category. Common contaminants include:
- Wax and paint sealants left on the panel from a recent detail
- Silicone-based tire or trim dressing that migrated onto the paint
- Tar and bug remover residue that wasn’t fully rinsed
- Fingerprints and skin oils from handling the panel after the final wipe-down
Any one of these creates a barrier between the pressure-sensitive adhesive and the paint. The bond never fully forms, and the edge peels because it was never really attached.
Material choice. Cast vinyl is extruded thin and cures without internal stress, so it holds its dimensions through years of heat cycling. Calendered vinyl is rolled to thickness under pressure, which bakes in tension that releases slowly over the life of the wrap. That released tension shows up as shrink-back at the edges, corners, and seams first, since those are the spots with the least surface area holding the film down.
Adhesive thermal limits. Every adhesive has a working temperature ceiling. Push it past that ceiling, on a black hood in July, for example, and the adhesive can soften and creep rather than hold firm. Horizontal panels that bake in direct sun for hours are far more prone to this kind of slow edge failure than a vertical door panel that gets shade for part of the day.
Poor trimming and unsealed edges. A ragged cut edge gives wind, water, and car-wash brushes something to grab onto. Skip the sealer step and that raw edge is exposed to moisture that works its way under the film from the outside, undermining a bond that might otherwise have held fine.
How to Prevent Vinyl Wrap Lifting From the Start
Most edge lift is preventable with a disciplined install sequence, and the good news is none of the steps below require exotic equipment. They just require not skipping them.
- Wash and clay bar the panel. A standard wash won’t pull embedded contaminants out of the clear coat. A clay bar will. This step alone eliminates most of the wax and residue problems that cause silent adhesion failure later.
- Wipe with 70% isopropyl alcohol or a dedicated panel pre-cleaner. Do this last, immediately before film goes on, and do not touch the panel with bare hands afterward. Skin oil undoes the cleaning step instantly.
- Stretch deliberately, not aggressively. Compound curves need heat and patience, not brute force. When a section resists, it’s often faster and more durable to relief-cut and tuck than to force one continuous stretch that stores tension you’ll pay for in three months.
- Overlap seams by 1/4 to 1/2 inch, angled so the top layer sheds water away from the seam rather than catching it. This shingle technique is standard practice for a reason: it turns a vulnerable seam into a self-draining edge.
- Post-heat every edge with an IR thermometer in hand, not a guess based on how the gun feels in your hand. Hit the adhesive’s activation range and hold the heat long enough for full activation, then focus extra dwell time specifically on edges, cut lines, and any recessed areas like door jambs.
- Seal every cut edge. Liquid edge sealer or edge-specific tape belongs on cut edges, bumper wraps, mirror caps, and door jambs, the exact spots most exposed to water intrusion and repeated flexing. Installers who skip this step are betting the adhesive alone will hold against years of car washes and rain.
- Specify cast vinyl and ask for dimensional-stability data. If you’re paying a shop, ask what the film is made of and whether the manufacturer publishes shrinkage figures. A legitimate technical data sheet will state expected dimensional change under thermal cycling.
Pro Tip: Before wrapping, run your bare hand across the door jambs and behind the mirrors. If it feels even slightly slick, there’s contamination there that a quick wipe-down won’t fully remove. Partner cleaning guidance like this door-jamb cleaning method will get you to bare, wrap-ready paint in 10 to 20 minutes without damaging existing coatings.
Prevention here is genuinely cheap. A heat gun, an IR thermometer, alcohol wipes, and a bottle of edge sealer run well under $200 total, a fraction of what it costs to redo a section, let alone a full fleet vehicle, once the lifting has spread.
How Do You Know Which Repair Path to Choose?
Not every lifted edge needs the same fix, and picking the wrong one just means doing the job twice.
Start with a quick inspection checklist:
- How long has the wrap been installed? Lifts appearing in the first month often point to tension or under-activation. Lifts showing up after a year lean toward material shrinkage.
- How big is the lifted area? A half-inch curl at one corner is a different job than an eight-inch flap along a whole panel edge.
- Is there visible discoloration or residue on the paint under the flap? That’s your contamination signal, and it changes everything about the repair.
- Does the film show waviness or a shrunk-back gap along the edge, rather than a simple curl? That points to material shrinkage, not tension.
Run two field tests before you commit to a fix. First, reheat the lifted section slightly and watch how it behaves: does it relax flat, or does it immediately want to spring back up as it cools? Springback under gentle heat usually means stored tension. Second, once you’ve pressed it down and let it cool, check it again after a few hours. If it’s already lifting again with no visible dirt, contamination is the likely cause even if you can’t see it directly, since testing for movement after cooling is a standard diagnostic step installers use to separate tension issues from adhesive failure.
The decision from there is fairly clean. Small, tension-related lifts caught early respond well to reheat-and-seal, often on the first try. Contamination-driven lifts almost never hold after a simple re-seal. If the paint under the flap shows any residue or discoloration, plan on section replacement, because re-sealing over a compromised bond just delays the same failure. And if you’re seeing shrinkage-driven lift across multiple panels on a vehicle, that’s usually a sign the film itself, not the install, is the problem, which means full panel replacement with a different material spec. If you find yourself repairing the same spot for the third time, that’s not a technique problem anymore. That’s a sign you need a different installer, a different material, or both.
How Do You DIY-Repair a Lifted Vinyl Wrap Edge?
Lay out four tools before you start: an infrared thermometer, a heat gun with adjustable output, a felt squeegee, 70% isopropyl alcohol, liquid edge sealer, and a pair of nitrile gloves so you’re not depositing skin oil back onto the cleaned surface.
- Clean the lifted section and surrounding inch of film with isopropyl alcohol. Let it flash off completely before applying any heat.
- Test-heat a hidden area first to confirm your gun setting. Check the temperature with the IR thermometer rather than judging by feel.
- Reheat the lifted edge to the adhesive’s activation range, moving the gun steadily rather than parking it in one spot, which risks scorching the vinyl or the clear coat underneath.
- Press and hold with the felt squeegee, working from the solid, still-bonded film toward the loose edge, and keep pressure on until the section cools to room temperature.
- Apply liquid edge sealer along the seam once cooled, following the product’s stated cure time before exposing the vehicle to rain or a wash.
- Recheck the repair after 24 to 48 hours. If it’s already lifting again with no visible contamination, that’s your signal it was a tension issue that needs a bigger relief cut, not just heat.
Three mistakes ruin this repair more than any others. Over-stretching the film while pressing it down, which just reintroduces the tension that caused the lift in the first place. Skipping the alcohol wipe and sealing contamination under the reheated edge. And relying on how hot the gun feels rather than what the IR thermometer actually reads, which is how people either underheat the bond or overheat and damage the film.
Pro Tip: Mark small repairs with a strip of low-tack tape and the date. If the same spot lifts again inside two weeks, stop repeating the same fix. That’s a contamination or tension problem, not a heat problem, and it needs a different approach.
Why Do Professional Installs Fail Less Often?
Professional shops build in checks that most DIY installs skip, and that’s really the whole difference in outcomes.
Climate-controlled installation keeps both the panel and the film at a consistent, workable temperature throughout the process, which removes one of the biggest variables in adhesive activation. Combine that with cast vinyl backed by manufacturer dimensional-stability data referencing standards like ASTM D1204, and you’re starting from a material that’s less likely to shrink at all. Post-heat gets verified with an infrared thermometer against a specific target, not judged by feel, and when contamination shows up under a test lift, the response is section replacement rather than a re-seal that’s likely to fail again.
If you’re paying for professional work, ask three direct questions: what temperature and dwell time do they target during post-heat, can they show you the film’s technical data sheet, and what does their warranty actually cover if an edge lifts in the first year.
What Most Advice on Wrap Lifting Gets Wrong
Most articles treat edge lift as one problem with one fix. It’s not. It’s at least four different failures that happen to look identical from three feet away, and that’s exactly why so many DIY fixes fail twice.
The conventional advice, “just reheat it and press it down,” works maybe half the time, and only for the tension and under-activation cases. Apply that same fix to a contaminated bond and you’re guaranteed a repeat visit within a week, because you never addressed the actual problem. That’s the gap that matters most here: diagnosis before repair, not repair as a reflex.
If there’s one habit worth stealing from professional installers, it’s measuring instead of guessing. An infrared thermometer costs less than a tank of gas and removes almost all the ambiguity from post-heat activation. Feel is not a repeatable spec. A number on a thermometer is.
The bigger point, and one DIYers underrate constantly, is that prevention is dramatically cheaper than repair. A careful clay bar and alcohol wipe before install takes twenty extra minutes and eliminates the single most common cause of silent adhesion failure. Skip it, and you’re gambling that no wax, no silicone dressing, and no fingerprint made it onto that panel. That’s a bad bet to make on a vehicle that’s supposed to look sharp for years, not months.
— NJ Vinyl Wrapz
When Should You Call a Professional for Wrap Repair?
If you’ve tried the reheat-and-seal fix twice on the same spot and it keeps lifting, stop repeating it. That pattern almost always means contamination under the adhesive or a material shrinkage problem that a heat gun and squeegee can’t solve. Large-area lifts, anything beyond a small corner or seam, and any lift where you can see discoloration on the paint underneath both call for a professional look before the damage spreads further.
Specialist companies handle exactly this kind of diagnostic and remediation work: identifying whether a lift is tension, contamination, or shrinkage, then executing the right fix, whether that’s a clean section replacement or a full re-wrap with a properly specified cast vinyl. Installs happen in a climate-controlled facility, which removes the temperature inconsistency that causes a lot of the under-activation problems DIY installers run into on a driveway in variable weather.
For fleet owners dealing with lifting across multiple vehicles, that’s usually a sign the original material or install protocol needs a fix, not just a patch on this month’s problem truck. If your wrap needs a full refresh rather than a spot repair, the full vehicle wraps page is the place to start, or reach out through NJ Vinyl Wrapz directly to get a section inspected before it turns into a bigger job.
Sources
- Vinyl Wrap Fails After 1 Year: 7 Root Causes – HighCool
- Vehicle Wrap Troubleshooting Guide - Fix Common Issues | WrapSize
- How to Vinyl Wrap a Car: Step-by-Step for 2026
- Seamless Success: Your Ultimate Guide to Vehicle Wrap Edge Sealing
FAQ
Why Does My Vinyl Wrap Keep Lifting at the Edges?
Repeat lifting almost always means the underlying cause, tension, contamination, or material shrinkage, was never actually fixed, just patched. Reheating and pressing only works on tension and under-activation issues; contaminated adhesive needs section replacement.
What Should I Do if My Vinyl Wrap Is Peeling?
Clean the area with isopropyl alcohol, warm it to the adhesive’s activation range using an infrared thermometer to confirm the temperature, press and hold until cool, then seal the edge. If it lifts again within a couple of weeks, treat it as contamination or shrinkage and get it inspected rather than repeating the same fix.
How Well Do Vinyl Wraps Actually Hold Up Over Time?
A properly installed cast vinyl wrap with correct post-heat and edge sealing typically holds up well for years, while calendered vinyl is more prone to shrink-back and edge retreat as it cycles through heat and cold. Longevity depends heavily on material choice and installation quality, not just the brand of film.
What Are the Most Common Vinyl Wrap Problems?
The most common issues are edge lift, air bubbles, and wrinkling, and they usually trace back to overstretching, surface contamination, insufficient post-heat, or using calendered vinyl in a role that needed cast vinyl. NJ Vinyl Wrapz treats these as distinct diagnostic categories rather than one generic “wrap failure,” since each one needs a different repair.