Vinyl decals look straightforward until you’re halfway through your first application and a massive bubble refuses to budge. Most step by step vinyl decal application guides skip the details that actually matter: why the surface prep phase determines everything, when to use the wet method versus the dry method, and what to do when things go sideways mid-application. This guide covers all of it. Whether you’re decorating a laptop, a car window, or a full vehicle panel, you’ll finish this with the confidence and technique to get professional results on your own.
Table of Contents
- Key takeaways
- Tools and materials you actually need
- Surface preparation: the step most people skip
- Dry vs. wet application methods
- Post-application care and troubleshooting
- Advanced tips for curves, glass, and large decals
- What I’ve learned from years of working with vinyl
- Get professional results with Njvinylwrapz
- FAQ
Key takeaways
| Point | Details |
|---|---|
| Surface prep is non-negotiable | Cleaning with 70% isopropyl alcohol removes invisible oils that cause lifting and bubbles. |
| Choose your method by decal size | Use the dry method for small decals and the wet method for large or complex designs where repositioning matters. |
| Temperature affects adhesion | Apply vinyl between 50°F and 90°F for the strongest bond and most predictable results. |
| Patience during removal | Peeling transfer tape at a slow 180-degree angle keeps every piece of vinyl intact and on the surface. |
| Cure before you clean | Wait 48 to 72 hours after application before washing or exposing the decal to moisture or heavy weather. |
Tools and materials you actually need
Before you learn how to apply vinyl decals, you need the right gear on the table. Using improvised tools is one of the fastest ways to ruin an otherwise good decal, so this is worth taking seriously.
Here’s what you need before you start:
- Squeegee or rigid plastic card. A squeegee for firm strokes works best, but a credit card wrapped in a cloth handles the job fine without scratching delicate surfaces.
- Masking tape. You’ll use this to create alignment guides and the hinge technique covered later in this guide.
- Scissors or a craft knife. For trimming excess transfer tape or cleaning up the decal edges before application.
- Isopropyl alcohol (70%). The single most important cleaning agent in your kit. More on why below.
- Microfiber cloths. Lint-free and scratch-free. Paper towels leave micro-fibers that interfere with adhesion.
- Spray bottle with application fluid. For the wet method, you’ll mix a solution of 95% water and 5% dish soap. A clean spray bottle with a fine mist setting works perfectly.
For a more detailed breakdown of tools specific to vehicle surfaces, the decal installation guide for NJ fleets at Njvinylwrapz covers automotive-specific tooling worth reviewing.
Pro Tip: If you are budget-conscious, skip buying a dedicated squeegee at first. A plastic gift card or hotel key card wrapped once in a thin microfiber cloth gives you the firmness you need without spending anything extra.
Surface preparation: the step most people skip
Here’s the uncomfortable truth about vinyl decal failures. Most of them start before the decal even comes out of the packaging. The surface looks clean. It feels clean. It’s not clean.
Invisible microscopic oils from fingerprints, cleaning products, and environmental contamination sit on almost every surface. Vinyl adhesive bonds to the surface, not through it. If there’s a microscopic oil layer between the adhesive and the material, you’ll get lifting edges within days.
Follow these steps in order:
- Wash the surface with regular dish soap and warm water to remove visible dirt, dust, and grime.
- Dry the surface completely with a clean microfiber cloth. Do not air dry. Air drying can leave mineral deposits from tap water.
- Wait five minutes, then wipe the entire application area with 70% isopropyl alcohol using a fresh microfiber cloth in straight-line motions, not circles.
- Let the alcohol evaporate fully. This takes about 60 to 90 seconds. Do not touch the surface again after this step.
Temperature matters just as much as cleanliness. Applying vinyl below 50°F causes adhesive failure because the glue becomes too stiff to bond properly. Above 90°F, the adhesive can become too aggressive, making repositioning impossible and increasing the risk of trapped bubbles.
“Surface dry” and “surface ready” are two completely different states. One means no visible moisture. The other means no oils, no residue, and the right temperature. Only the second one works.
Pro Tip: If you are applying decals to a car panel outdoors, park the vehicle in the shade for at least 20 minutes before application. Direct sun heats metal panels well above safe application temperatures even on mild days.
For an auto-specific prep walkthrough that pairs well with this process, car coating prep steps from Many Ceramic Pro Touch covers the surface treatment side in useful detail.
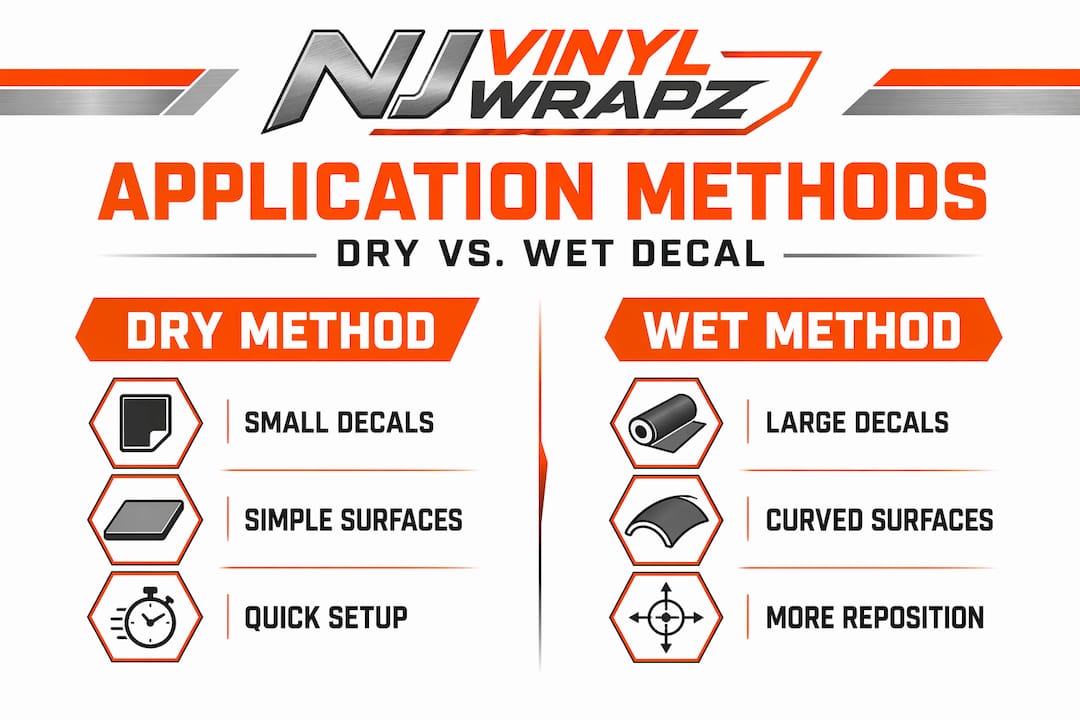
Dry vs. wet application methods
This is the heart of any vinyl decal application guide, and where most tutorials cut corners by only covering one method. Both work. Both have a clear use case.
Comparison at a glance
| Method | Best for | Repositionable | Risk level |
|---|---|---|---|
| Dry | Small decals, flat surfaces | No | Low for small work |
| Wet | Large decals, car panels, glass | Yes | Lower for large work |
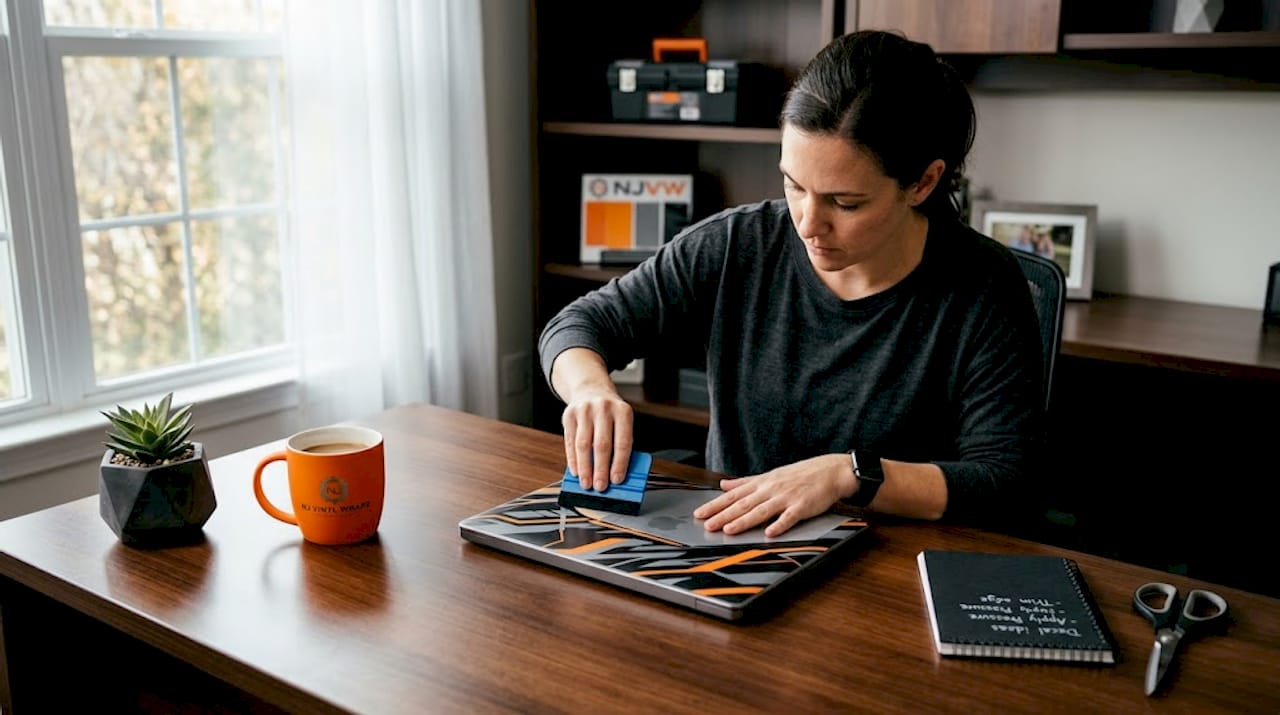
Dry method: step by step decal installation
- Lay the decal face-down and peel back one inch of the backing paper from one edge. Fold and crease the backing slightly so it stays out of the way.
- Apply a strip of masking tape down the center of the decal to create a masking tape hinge. This locks the decal in position and gives you a pivot point for accurate placement.
- Position the decal on the surface and confirm alignment before committing. Use the masking tape as your axis point.
- Flip one half of the decal back over the hinge. Peel the backing paper from that half only. Lay the adhesive side down carefully and begin squeegeeing from the center hinge outward using firm, overlapping strokes at 45-degree angles.
- Remove the hinge tape, flip the second half, peel its backing, and repeat the squeegee process.
- Peel the transfer tape slowly at a flat 180-degree angle. Go slow. Any resistance means a piece of vinyl is lifting with the tape. Stop, press that area down firmly, and continue.
Wet method: for large decals and curved surfaces
The wet method gives you a forgiving window to slide and reposition decals, which makes it the go-to choice for large graphics, car windows, and panels where alignment precision is critical.
- Mix your application fluid: approximately 95% water and 5% dish soap in a spray bottle. This wet solution lets you slide the decal freely for up to several minutes before the adhesive starts setting.
- Spray the application surface lightly. Then peel the backing paper from the decal and spray the adhesive side lightly too.
- Place the decal on the wet surface. You will be able to slide it into position. Take your time.
- Once positioned, squeegee from the center outward in overlapping strokes to push out the fluid and trapped air simultaneously.
- Let it sit for 15 to 30 minutes before removing the transfer tape. The extra wait time lets the adhesive start bonding through the remaining fluid.
Pro Tip: Do not over-saturate the surface when using the wet method. A light mist is all you need. Too much fluid extends drying time significantly and can cause the adhesive to weaken on lower-quality vinyl.
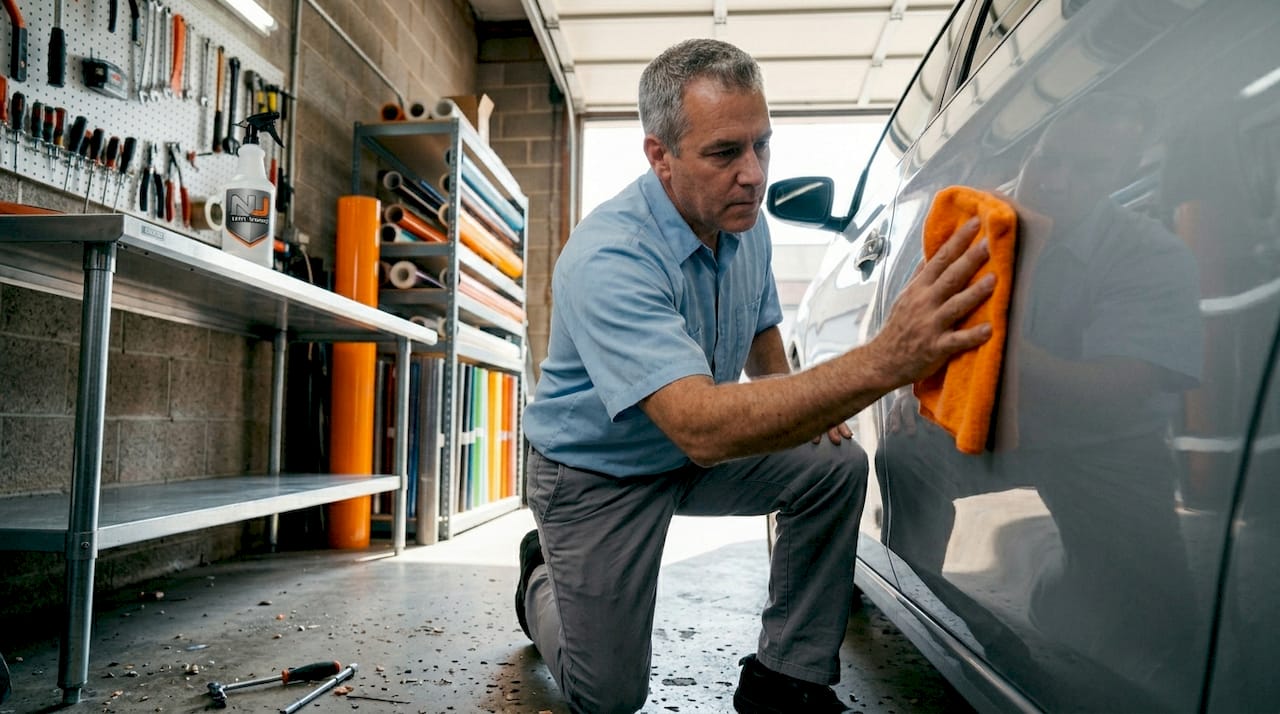
Post-application care and troubleshooting
Getting the decal on the surface is only part of the job. What happens in the next 48 to 72 hours determines whether it lasts for months or starts peeling by next week.
Common issues you will encounter and how to fix them:
- Small air bubbles. These are normal immediately after application. Many disappear as the adhesive cures. For persistent bubbles, use a small pin to make a tiny hole at the edge and press the air out with your fingertip. Do not use the squeegee aggressively on cured vinyl.
- Milky haze. This is moisture trapped under the vinyl, especially common with the wet method. It clears as moisture escapes through micro-channels in the adhesive, typically within 24 to 48 hours.
- Lifting edges. This almost always traces back to inadequate cleaning or applying in cold conditions. Press the edges back down with a heat gun on a low setting or a hairdryer, then squeegee firmly.
- Wrinkles during application. Lift the decal carefully from the point of the wrinkle and re-lay while squeegeeing outward again. On wet applications this is simple. On dry applications you have a much smaller window before re-laying becomes impossible.
Pro Tip: Wait at least 72 hours before running a vehicle through a car wash or exposing a freshly applied decal to rain. The full adhesion curing time is 48 to 72 hours, and water pressure or heavy moisture before that window can cause edge lifting.
When maintaining decals long-term, avoid abrasive cleaners and high-pressure washing aimed directly at decal edges. For vehicle prep practices that help decals stay put longer, this guide on preparing your vehicle for wraps from Njvinylwrapz is worth reading.
Advanced tips for curves, glass, and large decals
Flat surfaces are forgiving. Once you move to curved panels, glass, or multi-piece decals, the process demands more precision.
- Burnish before you peel. Before removing the backing paper, lay the decal face-down and rub the back of it firmly with your squeegee. This burnishing step ensures the vinyl is fully pressed against the transfer tape so no pieces stay stuck to the backing when you peel it away.
- Use heat on curves. For rounded surfaces like door panels, bumpers, or cylindrical objects, apply gentle heat with a hairdryer on a low setting held 6 to 8 inches away from the surface. Heat makes the vinyl pliable enough to conform without bunching or wrinkling.
- Hinge method for large decals. For anything wider than 12 inches, the masking tape hinge is not optional. It is the difference between a decal that lands straight and one you’re peeling off and restarting. Masking tape creates a stable pivot point that keeps the whole graphic locked in alignment during backing removal.
- Multi-color and layered decals. Apply base layers first and let each layer cure for at least an hour before adding the next. Squeegee each layer fully before moving to the next. Rushing layered applications is the top cause of misalignment and visible overlap edges.
For curved vehicle surfaces specifically, the van wrapping guide for NJ businesses at Njvinylwrapz walks through automotive panel geometry in practical detail.
What I’ve learned from years of working with vinyl
I’ve watched hundreds of DIY vinyl applications. Some were great. Many were not. And the failures almost always come back to the same two things: rushing the prep and skipping the burnish step.
The masking tape hinge is the most underrated technique in any vinyl decal application guide. People read about it, think it sounds overly complicated, and skip it. Then their decal lands a quarter inch off and they have to restart. Every experienced installer I know uses the hinge. Every time.
What tutorials rarely mention is how much environment kills good technique. I’ve seen flawless application methods produce bubbling, lifting decals simply because the ambient temperature dropped below 55°F during application. The vinyl was right. The prep was right. The conditions were wrong. Checking your temperature before you start is not a bonus step. It’s part of the process.
My honest advice: spend twice as long on prep as you think you need, do not rush the transfer tape removal under any circumstances, and if conditions are not right, wait. A decal applied in ideal conditions on a clean surface will outlast one applied in a hurry by months.
— Krunal
Get professional results with Njvinylwrapz

DIY vinyl decal application works beautifully for smaller projects. But when your vehicle, fleet, or commercial space needs graphics that absolutely cannot fail, professional installation makes all the difference. Njvinylwrapz has spent over 10 years installing high-performance vinyl graphics for businesses across New Jersey using 3M and Avery materials in climate-controlled facilities. Their team handles everything from vehicle lettering and decals to full vehicle wraps and complete fleet branding programs. If your next project involves complex curves, multi-panel graphics, or vehicles that represent your brand on the road, reach out to Njvinylwrapz for a consultation and see what professional application actually looks like.
FAQ
What is the best cleaner to use before applying a vinyl decal?
70% isopropyl alcohol is the recommended cleaner because it removes invisible oils and residue that soap and water leave behind, both of which prevent proper adhesion.
Can I reposition a vinyl decal after applying it?
With the wet method you can reposition for several minutes before the adhesive sets. With the dry method, repositioning after contact is very limited and risks stretching or tearing the vinyl.
How long should I wait before washing after applying a vinyl decal?
Wait 48 to 72 hours for the adhesive to fully cure before washing or exposing the decal to moisture, pressure, or heavy weather conditions.
Why does my decal have a milky haze after application?
Milky haze is trapped moisture, which is common with the wet application method. It typically clears within 24 to 48 hours as the adhesive cures and moisture escapes.
What temperature is best for applying vinyl decals?
Apply vinyl decals when the surface temperature is between 50°F and 90°F. Colder conditions stiffen the adhesive, and hotter conditions make repositioning nearly impossible.
Recommended
- Decal installation: A complete guide for NJ fleets | NJ Vinyl Wrapz
- How to wrap a van: a step-by-step guide for NJ businesses | NJ Vinyl Wrapz
- How to prepare your vehicle for a professional wrap | NJ Vinyl Wrapz
- Commercial Vinyl Services NJ | Window Graphics, Wall Murals & More | NJ Vinyl Wrapz | NJ Vinyl Wrapz