
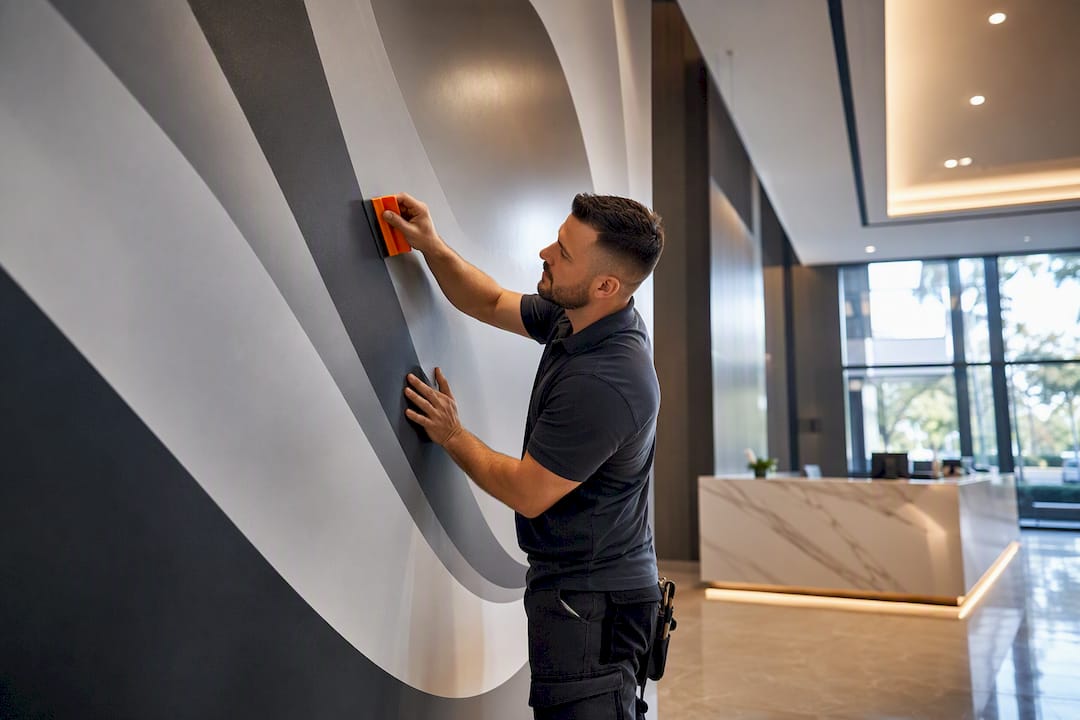
For most offices, professionally printed office wall graphics on commercial cast vinyl or rigid panels, installed by a trained crew, deliver the best mix of durability, brand accuracy, and minimal disruption. Choose removable calendered vinyl for short-term spaces you’ll refresh within a year or two, and cast vinyl or printed panels for anything meant to last. Start by surveying your walls and paint condition, then request a site assessment before ordering production.
TL;DR:
- Cast vinyl is ideal for permanent office branding, lasting five to ten years, while calendered vinyl is suitable for short-term uses of one to three years.
- Proper surface preparation and timing are crucial; a thorough adhesion test and waiting for paint to cure can prevent costly reprints and damage.
- Professional installation with quality materials and careful planning significantly extends graphic lifespan and avoids issues like bubbling, lifting, or mismatched colors.
- Graphics installed on textured or damaged walls should be mounted using rigid panels instead of vinyl to ensure proper adhesion.
- Removing graphics on well-prepared, primed surfaces generally leaves no damage, but poor surface conditions can cause paint peeling during removal.
Table of Contents
- What Materials Work Best for Office Wall Graphics?
- Where Should You Place Wall Graphics in an Office?
- How Do You Prep Files for a Large Office Wall Graphic?
- How Long Does Office Wall Graphic Installation Take?
- How Long Do Office Wall Graphics Last?
- What Should You Expect From a Professional Installer?
- What Does an Office Wall Graphic Project Cost?
- How Do You Remove Office Wall Graphics Without Damaging the Wall?
- Who Owns the Rights to Your Office Wall Graphic Design?
- What Actually Matters When You Plan This Project
- Ready to Turn Your Office Walls Into Working Brand Space?
- Sources
- FAQ
What Materials Work Best for Office Wall Graphics?
The material decision comes down to how long you need the graphic to survive and how much wall prep you’re willing to do. Cast vinyl is the workhorse for corporate installations meant to last: it’s thinner, more flexible, and conforms to texture and corners without the memory that causes calendered vinyl to lift at the edges over time. Cast vinyl outperforms calendered vinyl for installations running five to ten years, while calendered vinyl, typically 3 to 4 mil thick, suits shorter runs of one to three years, like a seasonal campaign or a pop-up event space.
Finish matters just as much as substrate. Matte laminates cut glare in conference rooms with heavy overhead lighting or window walls, while gloss finishes maximize color vibrancy for a logo wall meant to pop as a focal point. UV-resistant inks used indoors are designed to last for many years before noticeable fading occurs, generally longer than typical branding refresh cycles.
A few quick guidelines for matching material to purpose:
- Reception logo walls: cast vinyl with gloss or satin laminate for maximum color punch.
- Conference rooms with bright windows: matte finish to kill glare during video calls.
- Textured or brick walls: fabric or printed rigid panels instead of vinyl, since vinyl won’t adhere evenly to rough surfaces.
- Temporary event branding: calendered vinyl, budget-friendly and easy to remove.
Pro Tip: If your office has textured walls, don’t force vinyl onto them. A rigid printed panel mounted with wall anchors avoids the bubbling and lifting that plagues vinyl on stucco or heavy orange-peel drywall.
Where Should You Place Wall Graphics in an Office?
Placement decisions should follow foot traffic and sightlines, not just available wall space. Lobbies and reception areas earn the biggest visual investment since they’re the first brand impression a visitor gets, while conference rooms benefit from graphics that reinforce identity without competing with presentation screens.
Color choice can reinforce the room’s job: designers often lean on blue tones for client-facing trust in lobbies and reception, and warmer reds or oranges in collaboration zones meant to energize brainstorming sessions.
Placement priorities to keep in mind:
- Lobbies: largest graphic, highest resolution, first thing visitors see.
- Conference rooms: smaller focal accents that don’t distract from screens or whiteboards.
- Corridors and wayfinding zones: never cover exit signage, fire pull stations, or code-required directional markers.
- Collaboration areas: bolder color and typography to signal a shift in energy from formal spaces.
- Scale rule of thumb: text and logos should be readable from the farthest point people will stand or walk past, not just from three feet away.
How Do You Prep Files for a Large Office Wall Graphic?
Sloppy file prep is the single most common cause of a reprint. Vector artwork (AI, EPS, or PDF) is nonnegotiable for logos and text, since it scales cleanly to any wall size. Raster elements like photos need at least 150 to 300 DPI at final print size, not at thumbnail size, which is where most first-time submissions fall short.
Color accuracy takes more than eyeballing a screen. Follow this sequence before anything goes to production:
- Lock Pantone references for brand colors rather than relying on RGB or CMYK approximations that shift on different printers.
- Request a soft proof (digital color simulation) for quick internal sign-off.
- Order a hard proof on the actual substrate and lighting conditions of the install wall before committing to full production.
- Map obstructions on the wall, outlets, vents, thermostats, light switches, so the design and tile layout avoid or intentionally incorporate them.
- Plan seam placement for walls wider than standard roll widths, ideally hiding tile lines in corners or behind fixtures.
Pro Tip: Bring a paint chip or photo of your actual wall lighting to the proofing stage. Fluorescent and LED lighting render colors differently, and a proof approved under one light source can look off under the other.
How Long Does Office Wall Graphic Installation Take?
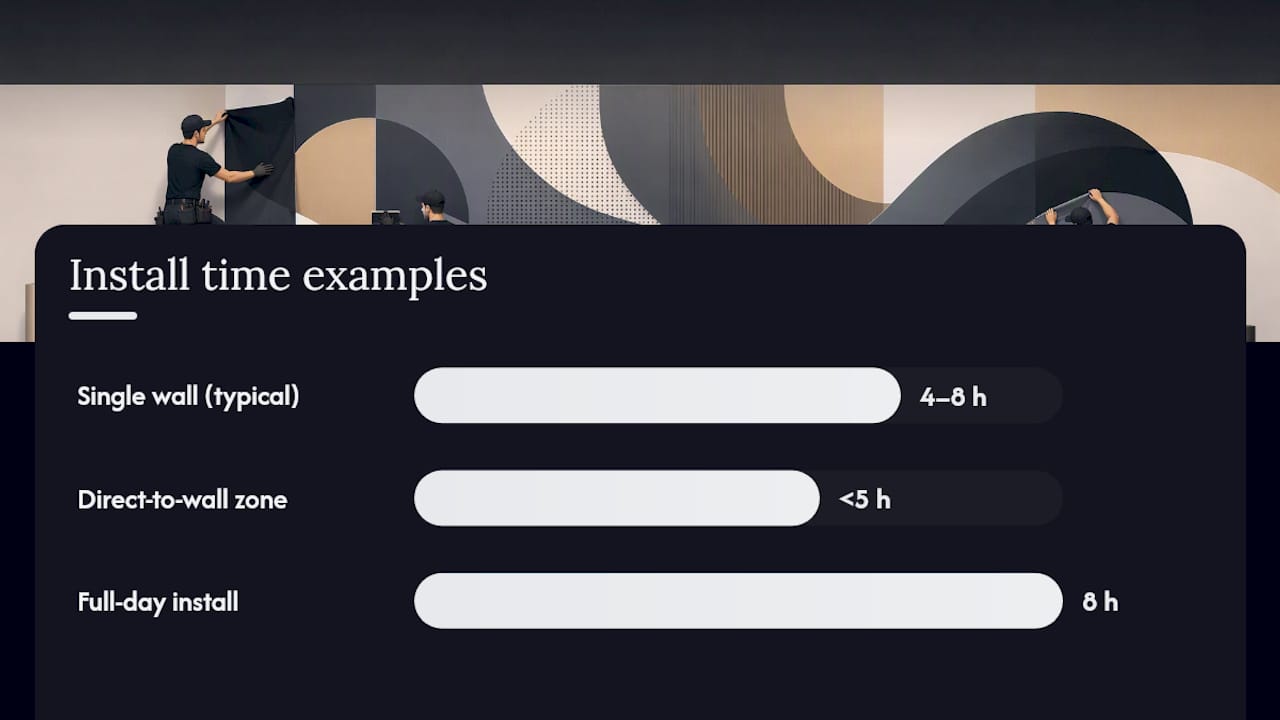
A single standard wall install typically runs four to eight hours, and installers should run an adhesion test on a sample patch before committing to full production, especially on low-VOC or scrubbable paints that behave differently than standard latex. Multi-location rollouts need phased scheduling rather than one marathon push, both for crew logistics and to keep any single office from losing full wall access at once.
Fresh paint needs time to finish releasing solvents before vinyl goes up. Outgassing from new paint can cause bubbling or adhesive failure; installers recommend waiting several days after painting before applying graphics to reduce risk.
- Test first. Run an adhesion patch test on the actual wall paint, not a generic sample board.
- Confirm paint cure. Wait out the outgassing window before scheduling install day.
- Choose your application method. Dry application is the standard for interior wall vinyl; water or wrap-style application fluids used on vehicles can actually damage drywall and shorten graphic life.
- Consider direct-to-wall printing. Adhesive-free, direct-to-wall printing eliminates seams entirely and can complete a zone in under five hours when planned as a scheduled operational project rather than squeezed in around business hours.
Pro Tip: Schedule installs for early morning or over a weekend if your office can’t afford a lobby or conference room going dark during business hours. A five-hour job on Saturday beats an eight-hour job that interrupts three client meetings on Tuesday.
How Long Do Office Wall Graphics Last?
Lifespan tracks directly to material choice. Removable calendered vinyl is built for a one to three year run, while cast vinyl with UV-resistant inks and a quality laminate can last five to ten years in normal office conditions, which is why most facility managers treat it as the default for permanent branding.
Care is simple but matters. A few habits keep graphics looking fresh for years instead of months:
- Clean with a non-abrasive cleaner and a microfiber cloth, never a scrub brush or ammonia-based glass cleaner.
- Check corners and high-touch edges near doorways monthly for early signs of lifting.
- Avoid pressure washing or steam cleaning near installed graphics during office deep cleans.
- Watch for bubbling near HVAC vents, a sign of trapped air or a moisture issue behind the wall.
Edge lift at corners and high-traffic touch points is the most common failure mode, and it’s largely preventable at install time rather than fixed after the fact.
What Should You Expect From a Professional Installer?
A rushed DIY install usually shows up in the details: visible seams, mismatched color across panels, or edges that start peeling within months. Professional production and installation, backed by material partners like 3M and Avery, is built to avoid exactly that. Some professional installers have spent many years running large-format vinyl projects, working in climate-controlled production facilities where humidity and temperature swings that warp print quality simply aren’t a factor.
A professional process for wall mural installation typically includes:
- A site survey to document wall condition, paint type, obstructions, and lighting.
- An adhesion test on the actual substrate before production begins, not after.
- A color proof reviewed against Pantone references and the real install lighting.
- A scheduled install window, phased across locations for multi-site rollouts.
- A final QA checklist covering seam alignment, edge adhesion, and color consistency wall to wall.
That process is what separates a graphic that looks sharp for a decade from one that needs replacing after eighteen months.
What Does an Office Wall Graphic Project Cost?
Pricing for office wall graphics scales with three variables: total square footage, material class, and installation complexity. A small accent graphic in a single conference room costs far less than a full lobby wraparound mural, and material choice moves the number more than most buyers expect, cast vinyl with premium laminate runs higher than economy calendered vinyl, but it also lasts three to five times longer.
Budgeting realistically means accounting for more than just the printed material. Design and file prep, especially Pantone color matching and multi-panel tiling for oversized walls, adds cost on top of the print itself. Wall prep, patching holes, repainting a damaged section, or waiting out a paint cure window, can also shift a timeline and budget if it’s discovered late. Installation labor varies with wall height, obstruction count, and whether the crew has to work around business hours or coordinate a multi-location rollout.
The smartest approach is to request an itemized quote broken into design, material, and labor rather than a single lump figure. That breakdown lets you compare options honestly, swap a laminate tier or finish to hit a budget target, and see exactly where a phased or multi-site project adds cost. A detailed pricing breakdown for office wall graphics is worth reviewing before you request bids, so you know what questions to ask and what a fair quote actually includes.
How Do You Remove Office Wall Graphics Without Damaging the Wall?
Removal risk depends almost entirely on what went up in the first place. Calendered vinyl, designed for shorter runs, generally peels off cleanly with low adhesive residue. Cast vinyl installed correctly with the right adhesive tier should also release without stripping paint, provided the wall was properly primed and the vinyl wasn’t applied directly over fresh or peeling paint.
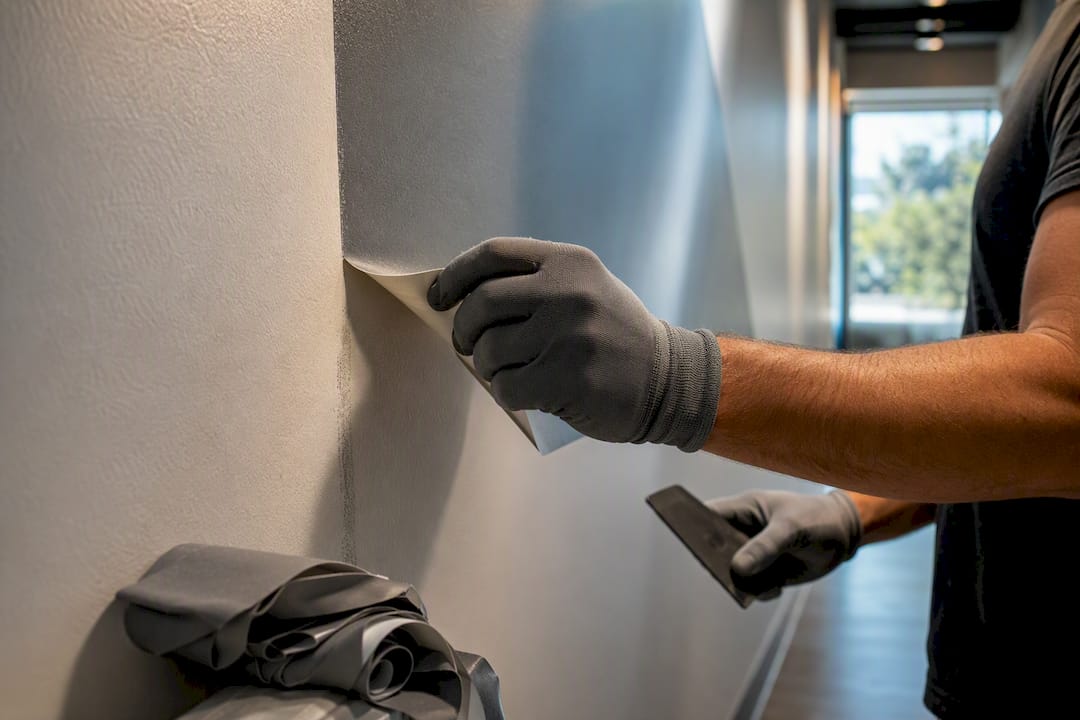
The real damage risk shows up when graphics were installed on a poor substrate to begin with, over unprimed drywall, a wall painted with cheap flat paint, or a surface that wasn’t fully cured before the install. In those cases, removal can pull paint off in sheets along with the vinyl, leaving a patch-and-repaint job as part of the removal budget.
A few practices reduce removal risk considerably:
- Use a low-heat heat gun or hair dryer to soften adhesive before peeling, working slowly at a low angle.
- Test a small corner first to gauge how the paint underneath is holding up.
- Budget for touch-up paint or a full repaint if the graphic covered a large wall for several years, since sun-faded paint around the edges is common even when the wall underneath is undamaged.
- Hire the same team that installed it when possible; they know the substrate and adhesive used and can plan removal accordingly.
Removal is rarely the hard part. Getting the wall back to a paintable, presentable condition afterward is where the real planning matters.
Who Owns the Rights to Your Office Wall Graphic Design?
Copyright and licensing questions come up more often than most office managers expect, especially when a graphic uses stock photography, a licensed font, or artwork from an outside designer. Purchasing a print doesn’t automatically transfer ownership of the underlying design. Unless a contract explicitly assigns copyright or grants a perpetual license, the designer or photographer may retain rights to the artwork itself, even though you own the physical printed product on your wall.
Stock photography and illustration licenses matter here too. Most stock licenses restrict how an image can be used, some prohibit large-format printing above a certain size, and reproducing a stock image at mural scale without the right license tier can violate the terms even if you paid for the original download. Fonts carry similar restrictions; many commercial fonts require a separate license for use in printed signage versus digital use.
If your office wall graphic incorporates a client logo, partner branding, or a licensed character or trademark, get written permission before production. Trademark holders can and do object to unauthorized use, even in a good-faith internal display. The safest path is straightforward: work with a designer who provides original artwork with clear usage rights, keep the licensing paperwork for any stock elements, and confirm in writing who owns the final files once the project wraps.
What Actually Matters When You Plan This Project
Most guides to office wall graphics read like a materials catalog: pick a vinyl, pick a finish, done. That misses where projects actually go wrong. The failure point almost never happens at the design stage; it happens at installation, when nobody ran an adhesion test, nobody waited out the paint cure window, and nobody planned around business hours.
The conventional advice treats material selection as the hard part, but coordinating phased scheduling and operational workflows using tools like Mobile Detail AI can significantly reduce disruption during installation. It isn’t. Cast vinyl versus calendered vinyl is a five-minute decision once you know your timeline. The harder, less discussed problem is disruption: how do you get a lobby wall installed without shutting down reception for a full business day, or coordinate five office locations without four of them looking different because a different crew handled color proofing.
Prioritize the adhesion test and the paint cure window before you even finalize artwork. A perfect design on a wall that rejects the adhesive is a wasted print run. After that, prioritize scheduling, early mornings, weekends, phased rollouts, over squeezing a crew in around client meetings. Everything else, finish, color, placement, is easier to get right once those two fundamentals are locked down.
— NJ Vinyl Wrapz
Ready to Turn Your Office Walls Into Working Brand Space?
If you’ve been comparing DIY decal kits against a professional install, here’s the honest tradeoff: DIY kits save money upfront but tend to show seams, mismatched color, and edge lift within a year or two, exactly the failure points this guide walked through. Professional installers handle office wall graphics with premium 3M and Avery materials, climate-controlled production, and a crew trained on adhesion testing and dry application so the install holds up for years, not months.
Some service providers work with office managers and business owners across multiple states who need a lobby, conference room, or corridor branded without gambling on a printer that’s never installed on drywall before. If your office also has glass entryways or floor-level branding to coordinate, our window graphics and floor graphics services extend the same finish quality to those surfaces. Ready to see what your space needs? Visit NJ Vinyl Wrapz to request a site assessment and get a project quote tailored to your walls, your timeline, and your budget.
Sources
- Cast vinyl vs. calendered vinyl — Mactac
- 3M adhesion test kit for smooth walls — Fellers
- Avery Dennison IB650 — interior wall graphics application guidance
- Streamlining wall graphic installations — EastCoast MuralPros (2026)
FAQ
What Is the Best Wall Art for an Office?
The best option depends on your timeline: cast vinyl with UV-resistant inks suits permanent branding meant to last five to ten years, while calendered vinyl works well for temporary campaigns or seasonal refreshes.
How Do You Decorate Office Walls at Work?
Start with high-traffic, high-visibility spaces like the lobby and conference rooms, choose a finish (matte for glare control, gloss for vibrant focal points), and always confirm wayfinding and safety signage stay uncovered.
What Are Some Good Wall Decorations for an Office?
Custom branded murals, motivational typography walls, and printed rigid panels for textured surfaces all work well; the right choice depends on wall condition, room function, and how long you want the graphic to last.
What Kind of Wall Art Is Trending Right Now?
Bold, brand-forward murals with strong typography and color psychology, blues for client-facing trust, energetic tones for collaboration zones, are replacing generic framed art in most modern office redesigns.
Do Office Wall Graphics Damage the Wall When Removed?
Properly installed graphics on primed, fully cured paint generally remove cleanly, but graphics applied over cheap flat paint or an uncured surface can pull paint off during removal.