Your fleet vehicles are moving billboards rolling through New Jersey every single day. But here is the harsh reality: a wrap covered in road grime, lifting at the edges, or faded from UV exposure does not represent your brand. It undermines it. Fleet managers who treat wrap maintenance as an afterthought are quietly bleeding money on an asset that should be working hard for their marketing budget. This guide walks you through the exact tools, inspection routines, and protection strategies that keep commercial wraps looking sharp, extending their lifespan, and delivering consistent brand impact across every vehicle in your fleet.
Table of Contents
- Why vinyl wrap protection matters for fleet visibility
- Essential tools and materials for wrap protection
- Step-by-step guide to vinyl wrap maintenance
- Troubleshooting common wrap issues and mistakes
- What most fleet managers miss about wrap protection
- Get professional wrap protection for your fleet
- Frequently asked questions
Key Takeaways
| Point | Details |
|---|---|
| Edge care is critical | Regular inspection and sealing of wrap edges prevents most wrap failures and contamination. |
| Right tools matter | Using safe cleaning agents and edge sealers keeps wraps looking fresh and extends their life. |
| Proactive repairs pay | Early repair of lifting edges preserves brand visibility and minimizes costly replacements. |
| Scheduled maintenance benefits | Routine checks and care enhance ROI for fleet wraps by maintaining their impact and durability. |
| Professional support available | Expert maintenance services help fleet managers achieve optimal long-term wrap protection. |
Why vinyl wrap protection matters for fleet visibility
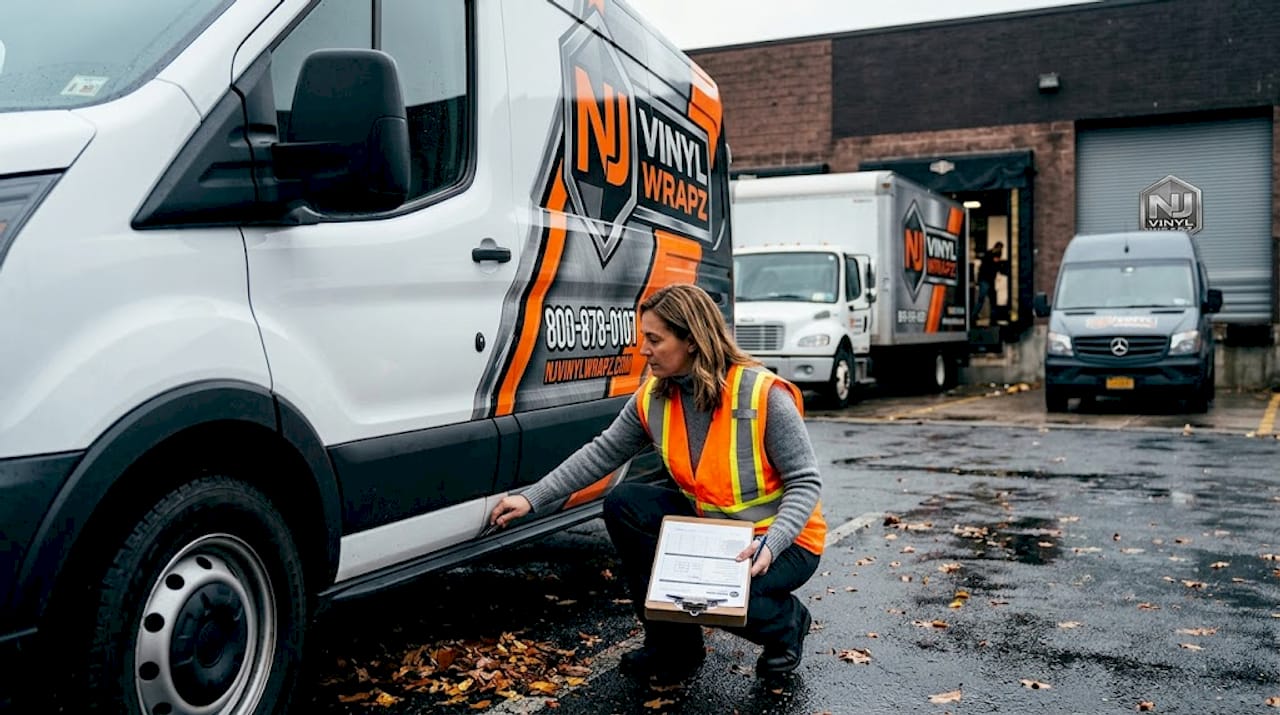
Think of a wrap the way you think of a storefront window display. When it is clean, crisp, and perfectly maintained, it pulls people in and communicates professionalism. When it is peeling, faded, or dirty, it signals the opposite and no amount of great logo design fixes that impression.
For fleet managers, this is not just an aesthetic concern. Your commercial vinyl services investment is a direct marketing cost, and that investment pays dividends only when the wrap is in peak condition. A well-maintained wrap on a delivery van traveling through Newark or Trenton can generate tens of thousands of brand impressions per month. A damaged or dull wrap generates doubt.
Here are the core reasons why protection is a strategic priority, not an optional extra:
- Brand consistency across your fleet depends on every vehicle looking sharp, not just the newest ones
- Wrap lifespan is directly tied to how well surfaces are cleaned and protected from UV and chemical exposure
- Resale and re-wrap costs drop significantly when the underlying paint is protected during the wrap’s life
- Customer perception is formed in seconds, and a degraded wrap sends the wrong signal before a word is spoken
- Marketing ROI falls apart if wraps are faded or damaged within two years of a five-year expected lifespan
One of the most overlooked failure points is the edges of the wrap. Edge issues are high-risk for commercial wraps, and lifting edges must be addressed quickly because moisture and dirt can migrate under the film once a gap appears.
Key insight: Contamination almost always starts at the edges. Once dirt or moisture works its way under the vinyl, it accelerates lifting across larger sections and can permanently damage the surface beneath.
Regular visual inspection of every wrap in your fleet, including close attention to door edges, hood lines, and bumper corners, is your first line of defense.

Essential tools and materials for wrap protection
Before you set up a maintenance routine, you need the right supplies on hand. Using the wrong products, especially harsh solvents or abrasive towels, can damage vinyl within a single cleaning session. Getting this right from the start saves money and prevents unnecessary re-wrapping.
Here is a quick-reference table for the core supplies every fleet manager should stock:
| Product type | Recommended option | Purpose |
|---|---|---|
| Wrap-safe soap | pH-neutral, non-wax formula | Removes grime without degrading vinyl |
| Microfiber towels | 400 GSM or higher | Prevents surface micro-scratches |
| Edge sealer | Knifeless tape or vinyl edge sealing solution | Seals cut edges to block moisture |
| UV protectant spray | Wrap-specific, non-wax UV spray | Slows color fading from sun exposure |
| Isopropyl alcohol (IPA) | 70% diluted solution | Spot-cleaning grease or adhesive residue |
| Soft detailing brush | Wrap-safe bristle brush | Cleaning panel gaps and recessed areas |
| Nitrile gloves | Standard workshop gloves | Protects hands during chemical applications |
When sourcing these products, your vehicle wrap options may already come with manufacturer recommendations tied to the specific vinyl film used. 3M and Avery both publish approved product lists for their wrap films, and following those lists is always the safest starting point.
Edge sealing products are commonly used to prevent moisture and dirt ingress, and they are especially critical for high-traffic vehicles that face constant road debris exposure. For fleets operating in coastal New Jersey or through heavy salt-treated roads in winter, this step is non-negotiable.
For an added layer of protection on your most exposed vehicles, consider pairing wrap care with paint protection film. Clear PPF applied over or alongside vinyl can absorb rock chips and shield the material from chemical contamination.
Pro Tip: Apply an edge sealer to every vehicle in your fleet immediately after installation and re-apply after any cleaning session where you notice edges showing any flexibility or micro-lifting. This takes about five minutes per vehicle and can add months to the wrap’s useful life.
Additional wrap-safe supplies worth keeping in your maintenance kit:
- Spray bottles for diluting IPA and soap solutions to precise ratios
- Grit guard buckets to prevent dirt from re-contaminating your wash mitt
- Wrap-safe clay bars for removing bonded surface contamination before sealing
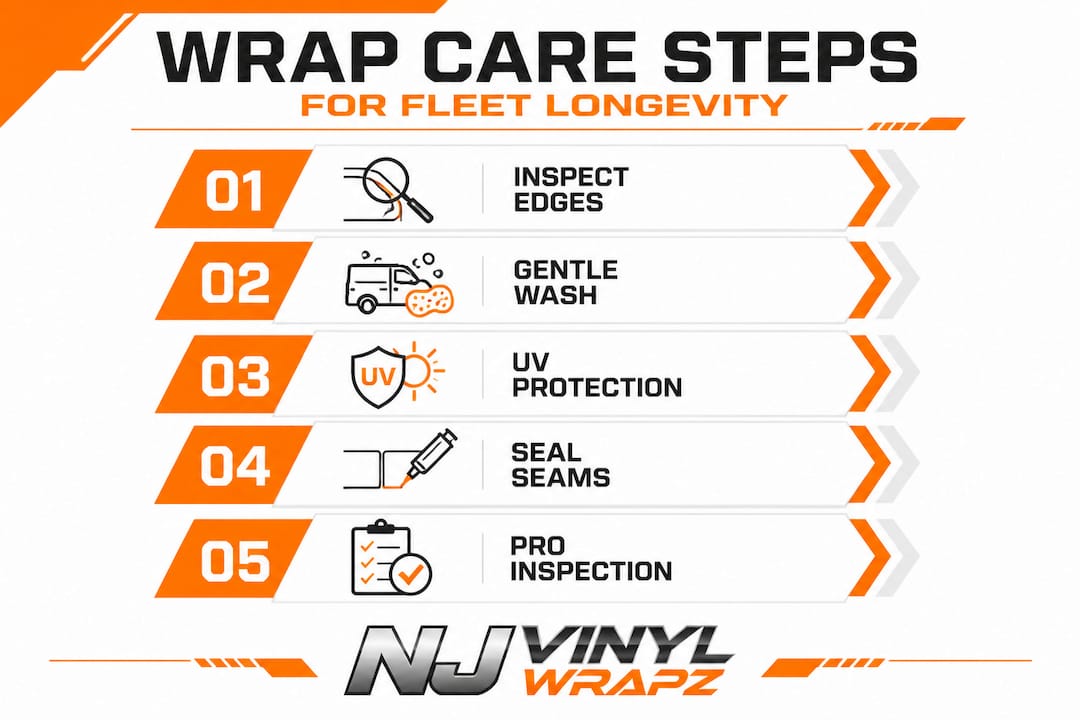
Step-by-step guide to vinyl wrap maintenance
With supplies ready, here is the routine that keeps wraps looking new and reduces the chance of early failure. These steps apply to full vehicle wraps as well as partial wraps, with minor adjustments for surface area.
-
Inspect the entire wrap surface before any cleaning. Look for lifting edges, bubbles, discoloration, or cracks. Pay close attention to panel edges, mirror housings, door handles, and bumper lines where stress concentrates.
-
Rinse the vehicle with low-pressure water to remove loose dirt before contact washing. Never use a high-pressure jet directly on wrap edges, as the force can work under any micro-gap and accelerate lifting.
-
Wash with pH-neutral soap using a clean microfiber wash mitt. Work in straight lines, not circular motions, and work top to bottom so dirty water flows away from already-cleaned sections.
-
Rinse thoroughly and air-dry or pat dry with a clean microfiber towel. Never drag a dirty towel across the surface. Change towels frequently when drying large fleet vehicles.
-
Spot-treat stubborn residue with a diluted IPA solution applied to a folded microfiber. This removes bug splatter, fuel drips, and adhesive transfer without damaging the vinyl.
-
Apply a UV protectant spray once the surface is fully dry. This step is often skipped but makes a measurable difference in color retention over a full year of operation in New Jersey’s four-season climate.
-
Seal or re-seal any lifting edges using an appropriate edge sealing product. Press firmly and hold for 30 seconds, then allow to cure before the vehicle returns to service. Lifting edges must be addressed quickly to prevent contaminant migration from expanding the damage zone.
-
Document any damage in your fleet maintenance log, including photos and vehicle ID. This data helps you track which vehicles need professional attention and supports warranty claims if relevant.
Pro Tip: Schedule a full wrap inspection after every major weather event, especially after heavy rain, hail, or the first winter salt exposure. New Jersey weather is tough on vinyl, and catching edge issues within 48 hours of a storm is far more effective than waiting for your next monthly check.
Here is a side-by-side comparison to help you decide when to handle maintenance in-house versus when to call a professional:
| Maintenance task | DIY | Professional |
|---|---|---|
| Routine washing and UV spray | Yes, easy and cost-effective | Not necessary |
| Edge resealing, minor lifting | Yes, with proper sealant | Recommended for large areas |
| Bubble removal | Yes, using heat gun carefully | Preferred for large bubbles |
| Graffiti or chemical contamination | Consult a pro first | Yes, to avoid damage |
| Wrap replacement or major repair | No | Yes, always |
| Fleet-wide inspection reporting | Yes, document and flag | Schedule for complex cases |
For fleet wrap protection at scale, building a hybrid routine that handles routine care in-house while scheduling quarterly professional inspections gives you the best balance of cost control and wrap longevity.
Troubleshooting common wrap issues and mistakes
Even with a solid maintenance routine, problems appear. Knowing how to identify and respond to them quickly is what separates a fleet that gets five years from a wrap from one that replaces wraps every two years.
The most common wrap failure signs to watch for:
- Edge lifting: Visible separation between the vinyl and the vehicle surface, often starting at cut edges near door gaps or hood lines
- Bubbling: Air or moisture trapped under the film, creating raised spots that scatter light and distort graphics
- Fading or discoloration: UV degradation that causes colors to shift or graphics to look washed out, most common on roof panels and horizontal surfaces
- Silvering: A shiny, crinkled appearance at the edges caused by the adhesive releasing from the substrate, often due to heat cycles
- Staining: Permanent marks from fuel, bird droppings, or industrial fallout left on the surface too long without cleaning
Watch out: Ignoring early signs like minor edge lifting or small bubbles is the most expensive mistake fleet managers make. A two-inch lifting edge today becomes a twelve-inch problem in three weeks, especially through freeze and thaw cycles in New Jersey winters.
For bubbles, a heat gun set to a low temperature and a smoothing squeegee can work for small areas. For large or recurring bubbles, the wrap may have an underlying adhesion issue that requires professional assessment.
For fading, applying a ceramic coating over certain wrap types can dramatically slow UV degradation while adding hydrophobic protection that makes weekly cleaning faster and more effective.
For lifting edges, act immediately. Apply edge sealer and press firmly. If the area is larger than a few inches, or if the underlying surface is showing contamination, contact a professional immediately. Contaminant migration under the wrap film compounds damage rapidly.
For color change wraps, check our specific guidance on color change wrap tips because matte and satin finishes have different cleaning requirements compared to gloss commercial graphics wraps.
One common mistake fleet teams make is using automated car washes with rotating brushes. These brushes create friction at edges and can catch and lift vinyl, especially on older wraps. Touchless automatic washes are acceptable in a pinch, but hand washing is always the best practice for wrapped vehicles.
What most fleet managers miss about wrap protection
Here is the perspective that rarely appears in basic wrap care articles: most fleet managers think of wrap maintenance as cosmetic, somewhere below oil changes and tire rotations in the priority list. That framing is costing them money.
A vinyl wrap is a marketing asset with a measurable cost per impression. When you calculate the average number of daily vehicle impressions in a New Jersey metro area and factor in the cost of the original wrap, you get a cost per impression that rivals, and often beats, paid digital advertising. But that math only works when the wrap is actually doing its job visually.
The real miss is edge maintenance. In our experience working with commercial fleets, the wraps that fail early almost always show a pattern: edges were never sealed or inspected, a small lift appeared, it was not addressed within the first two weeks, and then moisture and road salt did the rest. What could have been a five-dollar edge sealing fix becomes a full panel re-wrap.
Smart fleet managers we work with have started treating wrap condition as part of their regular fleet reporting, right alongside tire wear and fluid levels. They use the same monthly inspection framework for every vehicle, log any issues with photos, and know exactly which vehicles are due for professional attention. This approach, supported by our fleet wrap expertise, turns wrap protection from a reactive headache into a proactive system.
The deeper point is this: consistent wrap care is not just about protecting the material. It is about protecting the brand impression your fleet makes every single day on New Jersey roads. A fleet that looks sharp in year three sends the same confident message as it did in year one. That consistency builds brand recognition in a way no single ad campaign can replicate.
Get professional wrap protection for your fleet
Keeping your fleet’s wraps in peak condition takes more than good intentions. It takes the right materials, a consistent inspection schedule, and access to professional support when issues go beyond what your team can handle in-house.
At NJ Vinyl Wrapz, we specialize in exactly this. Whether you need expert installation of NJ full vehicle wraps, a budget-smart upgrade through partial wrap solutions, or a full fleet program through our fleet wraps in New Jersey service, our team is ready to help you get more years and more impact from every wrap. We use 3M and Avery premium materials, work in climate-controlled facilities, and bring over 10 years of commercial fleet experience to every project. Book a fleet inspection or consultation with us today and make sure your brand is showing up exactly the way you intend it to.
Frequently asked questions
How often should fleet managers inspect vinyl wraps?
Inspect wraps at least once a month, especially around edges, to catch lifting and prevent contamination. After major weather events, inspect immediately since edge issues are high-risk for commercial wraps and need fast attention.
What cleaning agents are safe for vinyl wraps?
Use mild, pH-neutral soap and water or wrap-specific cleaning products to avoid degrading the vinyl material or graphics. Avoid petroleum-based solvents, abrasive cleaners, and any product containing wax, which can hinder adhesion on wrap edges.
What do I do if my wrap edges start lifting?
Address lifting edges immediately by applying an edge sealing product and pressing firmly to close the gap. If the lifting covers a large area or contamination has already reached under the film, contact a professional to prevent further contaminant migration and damage.
Can paint protection film extend the life of vinyl wraps?
Yes, clear coatings like paint protection film add a barrier against rock chips, UV exposure, and chemical contaminants, helping the wrap underneath last significantly longer. PPF is especially valuable for fleet vehicles that operate in high-debris environments or on highways year-round.
Is professional wrap maintenance necessary for fleets?
Professional maintenance is not required for routine cleaning, but it is strongly recommended for edge repairs, bubble correction, and any damage involving contamination under the film. Fleets with multiple vehicles benefit most from scheduled professional inspections that catch issues before they become costly repairs.